Topaz Denoise AI 2026 Verdict
Use Topaz Photo AI / Denoise if you need a local desktop denoise workflow, detailed controls, and repeated photo cleanup on your own machine. Use Lightroom Denoise if your files already live in Adobe and you want fewer exports. Use MyImageUpscaler when the job is broader than denoise: upscale, sharpen, restore, or prepare images in a browser without managing a desktop editing stack.
| Tool | Best Fit | Workflow | Price / Version Note | Not a Fit When |
|---|---|---|---|---|
| Topaz Photo AI / Denoise | Photographers who want local desktop control | Desktop app with local rendering and cloud options | Topaz lists current plans on its pricing page; product naming has moved toward Topaz Photo rather than a standalone Denoise-only app | You need a quick browser workflow or dislike subscriptions |
| Lightroom Denoise | Adobe photographers already using Lightroom or Camera Raw | Built into Adobe RAW workflow | Included with eligible Adobe plans | You do not use Adobe or need stronger upscale/restore steps |
| MyImageUpscaler | Browser-based enhancement, upscaling, sharpening, and restoration | Upload, process, download | Free credits available; no desktop install | You require offline-only local processing |
| Open-source local tools | Technical users comfortable with setup | Local command line or GUI wrappers | Usually free, but setup time and GPU needs vary | You need support, speed, or predictable production results |
Current Pricing and Product Naming Check
Topaz pricing and naming have changed often. As of the current Topaz pricing page, Topaz sells photo enhancement through Topaz Photo plans rather than positioning DeNoise AI as the only standalone product. Check Topaz Labs pricing before buying, especially if you are comparing legacy perpetual licenses, annual subscriptions, or grandfathered upgrade terms.
Who Should Not Choose Topaz
Topaz is not the cleanest fit if your priority is a simple browser workflow, if you cannot upload or install large desktop software, if your machine lacks the GPU headroom for local rendering, or if your images need upscaling, sharpening, and restoration more often than pure noise reduction. In those cases, start with the faster workflow and only move to Topaz when local control is worth the added steps.
A noisy file usually doesn’t look disastrous in the field. It looks usable on the camera screen, usable on the laptop import preview, usable right up until you zoom in and see the grain crawling through skin, fabric, sky, or shadow detail.
That’s the moment topaz denoise ai built its reputation on. It gave photographers and retouchers a way to rescue high-ISO frames without smearing every edge into plastic. For a long time, that made it an easy recommendation.
In 2026, the decision isn’t as simple. Image quality still matters most, but so do hardware demands, app switching, export friction, subscription overlap, and the reality that many teams don’t just denoise. They also sharpen, upscale, prep for marketplace listings, and push batches through under deadline. A specialist desktop tool can still be the right answer. It just isn’t automatically the best answer for every workflow.
Try the AI photo enhancer on a noisy image before buying denoise software. Start with a light cleanup so texture does not become waxy.

Try It Yourself
Upload your image and see the AI enhancement in action. Start with 10 free credits.
The Perfect Shot Ruined by Noise
You know the file type. The wedding reception frame shot late in the evening. The wildlife image taken just before sunrise. The product photo from a supplier that looked passable until you cropped it for the hero slot on a store page.
Then you zoom to fit-critical detail, and the problem shows up everywhere. Fine grain in the shadows. Color speckling in neutral backgrounds. Texture that should read as fabric, fur, bark, or brushed metal turning into mush after aggressive cleanup.

Noise itself isn’t mysterious, but it becomes expensive fast. If you need a refresher on the root causes, this guide on what noise in photos actually looks like is useful because it maps the visual problem to the shooting conditions that create it.
Why this matters in real jobs
For a hobbyist, noise is annoying. For a working editor, it changes whether a file ships.
A nature photographer may accept some grain if the atmosphere holds together. A product team usually won’t. Marketplace imagery needs clean edges, stable backgrounds, and consistent output across a set. The more compressed or underexposed the source file is, the less room you have for sloppy denoising.
Clean noise reduction isn’t about making an image look smooth. It’s about keeping the parts buyers notice from breaking apart.
Topaz Denoise AI became popular because it handled this better than older noise reduction approaches. But the current question isn’t whether it works. It does. The key question is whether its desktop-first, specialist workflow still makes sense for the way you process images now.
The 2026 decision point
If you’re handling a handful of hero images, a dedicated app with granular control can be a great fit. If you’re moving through larger sets, the cost of extra steps becomes more obvious. Open file. Analyze. Compare models. Export. Reopen elsewhere for sharpening or scaling. Repeat.
That’s where the modern comparison gets interesting. Topaz still deserves attention for image quality. But if your day is built around throughput, consistency, and fewer handoffs, quality alone doesn’t settle the decision.
Understanding Topaz Denoise AI and Its Models
Topaz Denoise AI is a specialized denoising application. It isn’t trying to be a full editing suite. Its job is narrow and important. Remove digital noise while keeping actual detail intact.

That focus is the reason many pros still keep it in rotation. According to the Fstoppers review, Topaz Denoise AI uses deep learning trained on thousands of noisy images, and it can automatically choose models such as Severe Noise for extreme high-ISO files like ISO 3200 shots and Low Light for difficult night scenes. The same review notes that this is a major improvement over traditional methods that can degrade detail by 30-50% in luminance noise (Fstoppers review of Topaz Denoise AI).
If you want the broader concept behind these tools before comparing apps, this explainer on how denoising works in AI image workflows gives the right foundation.
The four core models
The version 3.1.1 update clarified Topaz’s model lineup into four distinct options: Standard, Clear, Low Light, and Severe Noise. That same update also let users compare up to three models against the original in one view, with independent settings that persist across sessions, as described in this Topaz DeNoise AI review and tutorial.
Those models matter because noisy files don’t all fail the same way.
- Standard works as the all-around starting point. It’s the safest first pass when the file has visible noise but no extreme failure mode.
- Clear is useful when the image needs cleanup without the heavier look that can come from stronger denoising.
- Low Light is where night scenes, dim interiors, and shadow-heavy files usually land.
- Severe Noise is the emergency option for badly compromised captures.
What works and what doesn’t
Topaz works best when the file still contains real structure for the model to preserve. Stars, foliage, feathers, textured clothing, bark, and architectural edges often benefit because the software can separate signal from random noise more convincingly than older tools.
It works less gracefully when the source is already heavily compressed, has weak tonal separation, or needs several corrections at once. Denoising alone won’t solve blur, scaling artifacts, soft focus, or bad local contrast. That’s where specialist tools can become workflow traps. The denoise result may be good, but the file still has to move somewhere else.
A short demo helps if you haven’t looked at the interface recently:
Practical rule: Start with the model that matches the failure type, not the one that produces the smoothest preview. Smooth previews often hide detail loss that becomes obvious in print or on high-resolution product pages.
Denoise AI vs MyImageUpscaler vs Lightroom
The buying decision usually comes down to three paths. A specialist tool. A built-in tool inside a broader photo editor. Or a browser workflow that favors speed and consolidation.
Here’s the quick comparison.
| Feature | Topaz Denoise AI | MyImageUpscaler | Lightroom Denoise |
|---|---|---|---|
| Primary role | Dedicated desktop denoising | Browser-based enhancement and upscaling workflow | Denoising inside Lightroom |
| Best use case | High-ISO files that need careful model choice | Teams that want fewer steps and all-in-one processing | Editors already committed to Lightroom |
| Detail control | High | Simpler, less granular | Moderate |
| Workflow complexity | Moderate to high | Low | Low inside Adobe workflow |
| Batch fit | Good, especially for dedicated runs | Good for web-based production handling | Good if the rest of the job is already in Lightroom |
| Trade-off | More control, more app friction | Faster consolidation, less manual tuning | Convenient, but less flexible than Topaz in tough texture-heavy files |

Topaz against Lightroom on image quality
The strongest quality comparison in the source set is the direct benchmark with Lightroom. In testing covered by Photofocus, Topaz DeNoise AI v3.7.2 using the Low Light model at a moderate setting of 34 preserved more intricate detail in stars and tree leaves than Lightroom Classic’s AI denoise at a moderate setting of 30, even when the overall noise reduction looked similar. At a high setting of 93, Topaz moved closer to Lightroom’s moderate result, though Lightroom still produced less residual noise in some areas, including color noise in skies (Photofocus comparison of Topaz and Lightroom denoise).
That matches what many editors care about most. Lightroom can look cleaner. Topaz often looks more believable in fine texture.
Topaz wins when the file has texture you can’t afford to lose. Lightroom wins when convenience matters more than maximum texture fidelity.
Workflow fit matters more than feature lists
For photographers already living inside Lightroom, Adobe’s denoise tool is attractive because it doesn’t ask you to change your environment. That matters. If your catalog, adjustments, exports, and client delivery all already happen there, one extra built-in step is easy to justify.
Topaz asks for a more deliberate workflow. That can be worth it on critical frames. It can also slow down production if denoising is just one correction in a longer chain.
The third option is the integrated web workflow. That matters most for teams that don’t want separate specialist apps for each correction. E-commerce staff, marketplace sellers, and content teams often need more than denoise. They need enlargement, cleanup, and output-ready files in the same pass.
That’s also why adjacent tools matter. If you’re building product imagery that goes beyond cleanup into presentation, resources like WearView’s product to model ai are useful because they show how image workflows increasingly combine enhancement with downstream creative production rather than treating every step as a separate software lane.
Where each tool makes the most sense
- Choose Topaz Denoise AI when the file is difficult, high-ISO, and detail preservation is the top priority.
- Choose Lightroom Denoise when your entire editing stack already lives in Adobe and you value convenience over deeper model control.
- Choose an integrated browser workflow when speed, simplicity, and fewer handoffs matter more than tweaking individual denoise behavior.
If you want a tool-specific breakdown of the first two paths, this side-by-side comparison of MyImageUpscaler vs Topaz is worth reviewing because it frames the trade-off around actual use, not just feature checklists.
The biggest difference isn’t whether these tools can reduce noise. It’s whether they force you to keep solving the rest of the file in separate places.
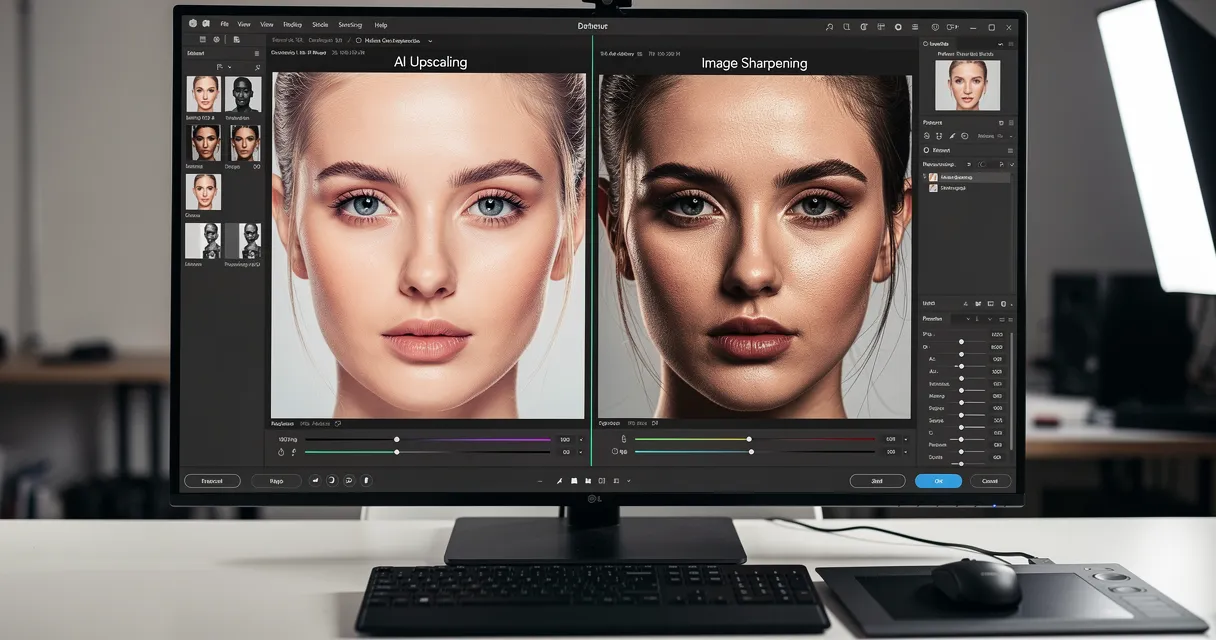
See the Difference
Experience crystal-clear upscaling that preserves text, logos, and fine details.
A good denoise pass should reduce grain while keeping hair, fabric, and edge detail. Upload one sample, compare at 100% zoom, then batch similar photos.
Real World Speed and System Requirements
Topaz Denoise AI is fast enough to feel modern on suitable hardware, but it still depends on the machine in front of you. That’s an important difference from a browser workflow, where the local computer matters less.
What the benchmarks actually say
Puget Systems’ testing is useful here because it separates assumptions from reality. Their benchmarks found that Intel’s Core i9-13900K was the fastest CPU overall for Topaz AI apps, at about 10% ahead of AMD’s Ryzen 7900X. In DeNoise AI specifically, the Ryzen 7700X beat the Core i7-13700K by 1.5%, while moving from an i5-class system to an i9 delivered only about 13% more performance. The most surprising result was the GPU story. High-end cards varied by only 6%, which Puget described as close to margin of error. The same analysis also noted that native M1 Mac support improved JPEG and RAW processing by 30-40% in one test, with 67s saved on 184MB 50MP DNGs compared with Rosetta (Puget Systems Topaz AI performance analysis).
That tells you two practical things.
- Throwing money at a top GPU won’t transform Topaz Denoise AI performance.
- A sensible CPU matters more than a flagship build for most users.
What this means in daily work
If you’re a photographer processing selected keepers, this is manageable. Waiting for exports on a handful of files doesn’t break the day. The software can preview quickly and, on compatible hardware, full filter application has been reported in 1-2 seconds per image in review coverage discussed earlier.
If you’re an agency or e-commerce operation, the equation changes. Hardware procurement, install maintenance, update cycles, and staff consistency become part of the speed discussion. Throughput isn’t just per-image render time. It’s also the time spent making sure every workstation behaves the same way.
Faster software on a demanding local machine can still be slower operationally than a simpler workflow that runs anywhere your team has a browser.
For teams evaluating whether speed or quality should dominate, this discussion of speed vs quality tradeoffs in image enhancement is a useful framing device. In practice, the best tool is often the one that gives enough quality without adding technical drag.
Sensible hardware advice
For Topaz users, the smart buy is usually balance. A strong mid-range CPU makes sense. Chasing top-tier GPU specs for this single task usually doesn’t. If the denoise step sits inside a larger Photoshop-heavy environment, your broader editing needs may justify better hardware. But for Topaz alone, benchmark evidence points toward moderation, not excess.
Comparing Price and Total Cost of Ownership
Sticker price is the least interesting part of this decision.
A one-time purchase can look economical until you count update management, app switching, separate sharpening needs, and the labor cost of training people to get consistent output. A subscription can look convenient until you realize you’re paying for an ecosystem you only partially use. A web service can look expensive per task until you notice it removes several other costs you were treating as normal.

The hidden cost in specialist tools
The biggest blind spot in most topaz denoise ai discussions is workflow friction. One of the verified source notes points out that reviews often skip the business impact of needing to move an image from DeNoise AI to Sharpen AI as separate paid products, while single-step browser workflows can remove that time and complexity overhead for agencies and e-commerce teams (video discussion on workflow friction and separate Topaz products).
That point matters more than many quality debates.
A specialist app asks you to accept context switching as normal. Open one tool for denoise. Another for sharpen. Maybe another stage for enlargement. Maybe a host app before or after all of that. Each step may be defensible. Together, they create friction.
Total cost shows up in four places
-
Software overlap
If denoise is only one part of your workflow, a dedicated app may not reduce the need for other software. It may add to it. -
Operational complexity
Desktop tools bring installs, updates, compatibility checks, and machine-to-machine differences. -
Training time
Topaz’s model choice is a strength, but it also means users need judgment. Not every operator will make the same call on Standard versus Low Light or Severe Noise. -
Rework risk
Every extra handoff creates another point where file format, color, or export decisions can drift.
Business view: The cheapest tool is the one that gets a usable file out the door with the fewest paid steps and the fewest avoidable decisions.
Who feels this cost most
A solo photographer can absorb tool switching more easily because the quality gain on a portfolio image may justify the slower path. A small studio starts to feel the drag when multiple people need repeatable output. A commerce team feels it immediately because image work is part of inventory operations, not a craft exercise.
That’s why total cost of ownership is the right lens here. Money matters, but so do minutes, consistency, and the number of times a file has to leave one environment to get finished. If a denoise tool saves detail but creates process sprawl, the quality win may be real while the business case gets weaker.
Which Denoise Tool Is Right for You
There isn’t one winner for everyone. The right choice depends on what kind of files you process, how much control you need, and how many moving parts your team can tolerate.
Choose Topaz when the file is the priority
Topaz makes the strongest case for photographers who work in difficult light and care about texture. The four-model structure established in version 3.1.1, with Standard, Clear, Low Light, and Severe Noise, is especially useful for specialists handling astrophotography, wildlife, archival restoration, or other files that don’t respond well to one generic denoise pass, as described in the earlier review reference.
If your work lives or dies on leaf detail, star fields, feathers, or edge fidelity in dim scenes, Topaz is still one of the clearest specialist choices.
Choose Lightroom when the workflow is the priority
Lightroom’s biggest advantage isn’t that it beats Topaz in every file. It doesn’t. Its strength is that it stays inside a system many photographers already use every day.
That means fewer exports, fewer round trips, and less overhead. If your files are mostly RAW, your edits already live in Adobe, and you want competent denoising without adding another decision-heavy app, Lightroom is the practical answer.
Lightroom is often the right tool when “good and already in my workflow” beats “better but slower to manage.”
Choose an integrated browser workflow when the operation is the priority
This is the best fit for teams that care about output consistency and low friction more than deep parameter control. Product teams, agencies, social content operations, and marketplace sellers rarely process one heroic image at a time. They process sets.
In those environments, the denoise question is rarely isolated. It sits beside scaling, sharpening, and preparing final delivery assets. An all-in-one browser workflow can be the better operational decision because it reduces software sprawl.
A short decision guide
-
You shoot high-ISO outdoor scenes, wildlife, or night scenes Topaz is the strongest fit.
-
You already manage everything in Lightroom
Stay in Lightroom unless a specific file demands more texture recovery. -
You run image production for products, listings, or campaigns
Favor the workflow that reduces app switching and keeps batch output predictable.
The wrong choice isn’t usually a bad denoise engine. It’s a tool that solves one visible problem while making the rest of the job harder.
Getting Started with AI Noise Reduction
A simple test file will tell you more than a week of reading reviews. Use an image with obvious shadow noise, fine texture, and one area where detail matters, such as hair, foliage, lettering, or fabric weave.
A practical Topaz pass
Open the file in Topaz Denoise AI and let it analyze the image. Start with the suggested model, then compare it against at least one alternative that matches the failure type. Check fine detail at pixel level, not just the fit-to-screen preview.
Export only after you’ve checked three things.
- Texture integrity in the detail-rich area
- Background cleanliness in flat tones or sky
- Edge behavior around contrast transitions
A practical browser pass
With a browser-based enhancer, the process is shorter. Upload the image, let the AI process it, inspect the result, and download the final file if the balance looks right. There’s less tuning, but that’s the point. You trade some manual control for speed and a lighter workflow.
If you want a broader primer before testing files yourself, this article on noise reduction in images is a solid starting point because it frames the choice around output quality, not just software branding.
The best approach is to test the same difficult image through both paths. If Topaz saves texture you can’t afford to lose, the extra handling may be justified. If the browser result is already good enough and the file is ready faster, that’s your answer too.
If you want a faster, lower-friction way to clean up noisy images, sharpen detail, and upscale files in one browser workflow, try MyImageUpscaler. It’s built for people who need production-ready results without installing another specialist app.
Frequently Asked Questions
Quick answers for this guide
How do I choose the right topaz denoise AI review &?+
Topaz Denoise AI review for 2026: when to use Topaz Photo AI, Lightroom Denoise, browser-based enhancement, or local alternatives. Compare tools by output sharpness, watermark policy, signup requirements, file limits, export quality, and whether the result holds up when inspected at 100%.
When should I use AI upscaling for this workflow?+
Use AI upscaling when the original image is too small for the target use case but still has enough detail to guide the model. For blog work, pay closest attention to source image quality, upscale settings, output dimensions, and final visual inspection, especially topaz denoise ai, image denoise, photo restoration.
How do I avoid losing quality after upscaling?+
Upscale once from the best original, avoid repeated compression, keep important text and edges sharp, and export in a format that matches the final use. If the output shows halos, smeared texture, or distorted text, reduce the upscale factor or use a cleaner source image.

Reviewed byJoao Furtado
AI Image Upscaling Specialist
Joao is the founder of MyImageUpscaler and an AI image upscaling specialist. He tests every guide against real upscaling workflows — comparing model outputs, evaluating sharpness and artifact tradeoffs, and validating tool recommendations before publication.
- AI image upscaling
- Model comparison
- Photo restoration
- E-commerce image prep