Upscale Image to 300 DPI for Print
To upscale an image to 300 DPI for print, you need enough pixels for the print size, then use AI upscaling only when the source image is too small. This guide shows the pixel math, when 300 DPI actually matters, and how to avoid blurry posters, photos, and art prints.
What Is 300 DPI and Why Does It Matter for Printing?
DPI stands for dots per inch — the number of ink dots your printer lays down per inch of paper. The more dots, the finer the detail.
- 72 DPI: Standard screen resolution. Looks fine on monitors, prints poorly.
- 150 DPI: Acceptable for large-format prints viewed from a distance (banners, posters).
- 300 DPI: The gold standard. Required for photo prints, business cards, brochures, and anything viewed up close.
Here's where people go wrong: they assume a photo that looks good on screen will print well. It won't. A 1000×750 pixel image displayed at 72 DPI looks fine at 13×10 inches on screen — but printed at 300 DPI, that same image is only 3.3×2.5 inches. Print it larger and you get pixelation.
The fix? You need more pixels. That's where upscaling comes in.
Upscale Image to 300 DPI: Print Size Calculator
Use this calculator first. If your image is already at or above the required pixel dimensions, do not upscale just because the DPI metadata looks low.
| Print Size | 300 DPI Pixels Needed | Minimum Acceptable for Distance Viewing | Upscale If Source Is Below |
|---|---|---|---|
| 4x6 inch | 1200x1800 px | 900x1350 px | 900x1350 px |
| 5x7 inch | 1500x2100 px | 1125x1575 px | 1125x1575 px |
| 8x10 inch | 2400x3000 px | 1800x2250 px | 1800x2250 px |
| 11x14 inch | 3300x4200 px | 2475x3150 px | 2475x3150 px |
| 16x20 inch | 4800x6000 px | 3600x4500 px | 3600x4500 px |
| 24x36 inch poster | 7200x10800 px | 3600x5400 px | 3600x5400 px |
Rule of thumb: upscale pixels, not DPI metadata. A 300 DPI file with too few pixels still prints blurry. A 72 DPI file with enough pixels can print sharply after you set the correct physical print size.
How to Upscale Image for Print (Step-by-Step)
Getting your image to 300 DPI for print doesn't require expensive software. Here's how to do it with AI in under a minute:
Step 1: Know Your Target Print Size
Before upscaling, calculate how many pixels you need. The formula is simple:
Required pixels = Print size (inches) × 300 DPI
| Print Size | Required Resolution |
|---|---|
| 4×6 inch | 1200×1800 px |
| 5×7 inch | 1500×2100 px |
| 8×10 inch | 2400×3000 px |
| 11×14 inch | 3300×4200 px |
| 16×20 inch | 4800×6000 px |
If your image is smaller than these dimensions, you need to upscale before printing.
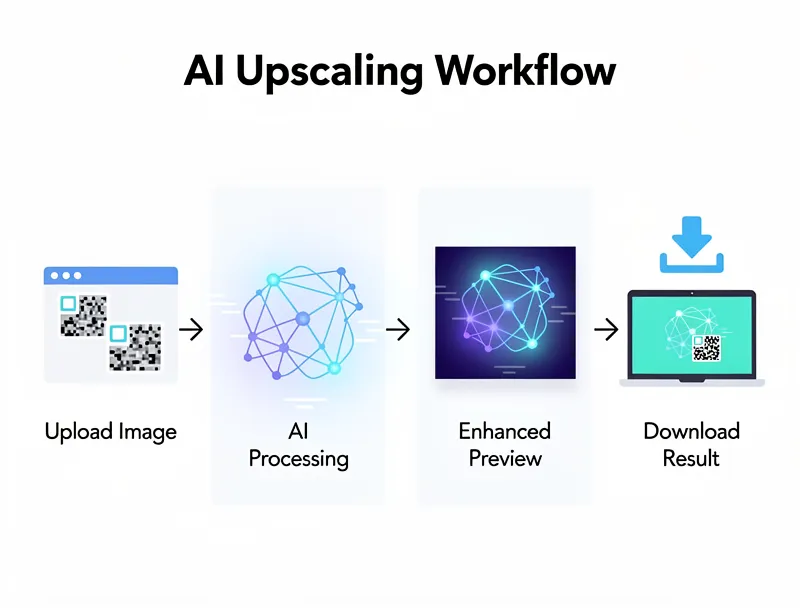
Step 2: Upload to the AI Upscaler
Head to our AI Image Upscaler and upload your photo. The tool supports JPEG, PNG, WebP, and most common formats.
No account needed. No watermarks. Just upload and let the AI work.

Try It Yourself
Upload your image and see the AI enhancement in action. Start with 10 free credits.
Step 3: Choose Your Upscale Factor
Select 2x, 4x, or higher depending on your starting image and target print size.
- 2x upscale: Good for photos that are slightly undersized
- 4x upscale: The sweet spot for most print projects — turns a 1000px image into 4000px
- Higher factors for large-format prints and posters
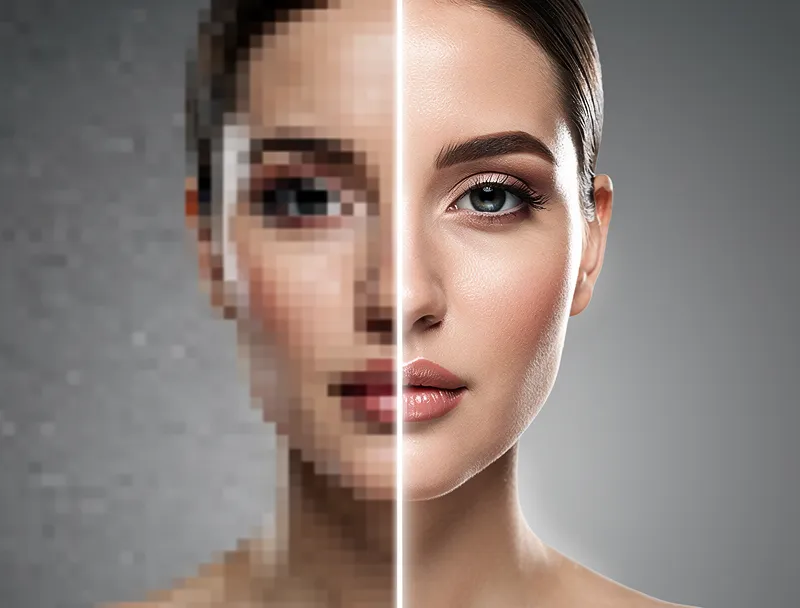
The AI doesn't just stretch pixels — it analyzes your image and generates new detail that wasn't there before. Edges stay sharp. Textures look natural. It's not magic, but it's close.
Step 4: Download and Print
Download your upscaled image, verify the resolution in your photo editor (File → Image Size in Photoshop, or Image → Scale Image in GIMP), and send it to the printer at 300 DPI.
Start upscaling your image for print now — free, instant, no signup required.
AI Upscaling vs. Traditional Resizing: What's the Difference?
This question comes up constantly. Here's the honest answer.
Traditional resizing (stretching an image in Photoshop) adds pixels by copying and interpolating existing ones. The math is simple, but the result is blurry at best, blocky at worst. Your printer gets more pixels, but they don't contain real information.
AI upscaling uses neural networks trained on millions of images to predict what details should exist at higher resolutions. It fills in sharpness, recovers edge definition, and preserves texture in a way that simple resizing cannot.
The difference is visible. Side by side, an AI-upscaled image printed at 300 DPI beats a traditionally resized one every time.
For print specifically — where you're producing a physical object someone holds and examines — that quality difference matters. If you're unsure whether your image needs upscaling, sharpening, or both, see our AI upscaling vs sharpening explained guide.
If you're consistently getting blurry prints, see why photos look blurry when printed — it covers the most common causes beyond just DPI.
When You Need 300 DPI (and When You Don't)
Not every print job needs 300 DPI. Here's a quick reference:
| Use Case | Recommended DPI | Notes |
|---|---|---|
| Photo prints (4×6, 5×7, 8×10) | 300 DPI | Viewed close-up |
| Business cards | 300–350 DPI | Fine text and logos |
| Brochures and flyers | 300 DPI | Professional printing |
| Posters (viewed >3 ft away) | 150 DPI | Distance reduces visibility of detail |
| Large format banners | 72–100 DPI | Viewed from 10+ feet |
| Billboards | 15–25 DPI | Viewed from far distances |
For anything a person will hold in their hands or read up close, 300 DPI is the minimum. Don't compromise there.
Getting Print-Ready Results
Upscale your image now for free — no account required, results in seconds.
Once you download your upscaled image, run through this quick checklist before sending to the printer:
- Resolution at or above 300 DPI at your target print size
- File format: TIFF or high-quality JPEG (avoid heavy compression)
- Color mode: CMYK if your printer requires it (most professional printers do)
- Bleed area: Add 0.125 inch bleed on all sides for trimmed prints
If you're printing through an online print service like Printful, Vistaprint, or a local shop, they'll usually specify their exact requirements. When in doubt, 300 DPI at the final print size is always safe.
See the Difference
Experience crystal-clear upscaling that preserves text, logos, and fine details.
Frequently Asked Questions
Can I upscale a low-resolution image to 300 DPI?
Yes. AI upscaling adds real detail to low-resolution images, making them suitable for print at 300 DPI. The quality of results depends on how much you're upscaling — going from 500px to 4000px will produce better results than going from 100px to 4000px. For best results, start with the highest-quality source image you have.
What file size do I need for a 300 DPI print?
It depends on your print size. Multiply each dimension in inches by 300 to get the required pixel count. For an 8×10 inch print, you need 2400×3000 pixels. For a 4×6 inch print, 1200×1800 pixels is sufficient.
Does upscaling actually improve print quality?
AI upscaling significantly improves print quality compared to printing a low-resolution image directly or using basic resizing. It won't create detail that never existed — a severely compressed thumbnail will still show limits — but for normally photographed images that are simply too small, AI upscaling produces dramatically sharper prints.
Is 300 DPI the same as 300 PPI?
For most practical purposes, yes. DPI (dots per inch) refers to printer output; PPI (pixels per inch) refers to digital image resolution. When your photo editor shows "300 PPI" and you print at 300 DPI, you get the crisp result you're after. Some people use the terms interchangeably — just make sure you're setting the right value before sending to the printer.
What's the best format to save an upscaled image for print?
TIFF is the professional standard — lossless, preserves all detail. High-quality JPEG (quality 90–100%) is also acceptable for most print services and produces smaller files. Avoid PNG for print unless your printer explicitly supports it, and avoid heavy JPEG compression (anything below quality 80).
Can I upscale images for free?
Yes. Our free upscaler lets you upscale images at no cost. Upload your photo, choose your upscale factor, and download the print-ready result. No subscription, no watermarks.
The Bottom Line
Blurry prints come from one source: not enough pixels. The solution is straightforward — upscale your image before printing, and use AI to do it so you get real quality instead of stretched mush.
For any print you'll hold, frame, or hand to a client, 300 DPI is the target. Our AI upscaler gets you there in seconds.
Need to know exactly what resolution you need for different paper sizes? Our image resolution guide for print sizes covers standard dimensions from wallet prints to posters.
Upload your image and get it print-ready now — free, no account required.
300 DPI Print FAQ
Can I just change 72 DPI to 300 DPI?
Only if the image already has enough pixels for the print size. Changing DPI metadata alone does not add detail.
When should I use AI upscaling for print?
Use AI when the source image is below the pixel dimensions required for the print size, especially for photos, art prints, posters, and product images viewed up close.
What causes blurry prints after upscaling?
Common causes are starting with a heavily compressed source, enlarging beyond what the image can support, exporting as a low-quality JPEG, or sharpening too aggressively after upscaling.

Reviewed byJoao Furtado
AI Image Upscaling Specialist
Joao is the founder of MyImageUpscaler and an AI image upscaling specialist. He tests every guide against real upscaling workflows — comparing model outputs, evaluating sharpness and artifact tradeoffs, and validating tool recommendations before publication.
- AI image upscaling
- Model comparison
- Photo restoration
- E-commerce image prep