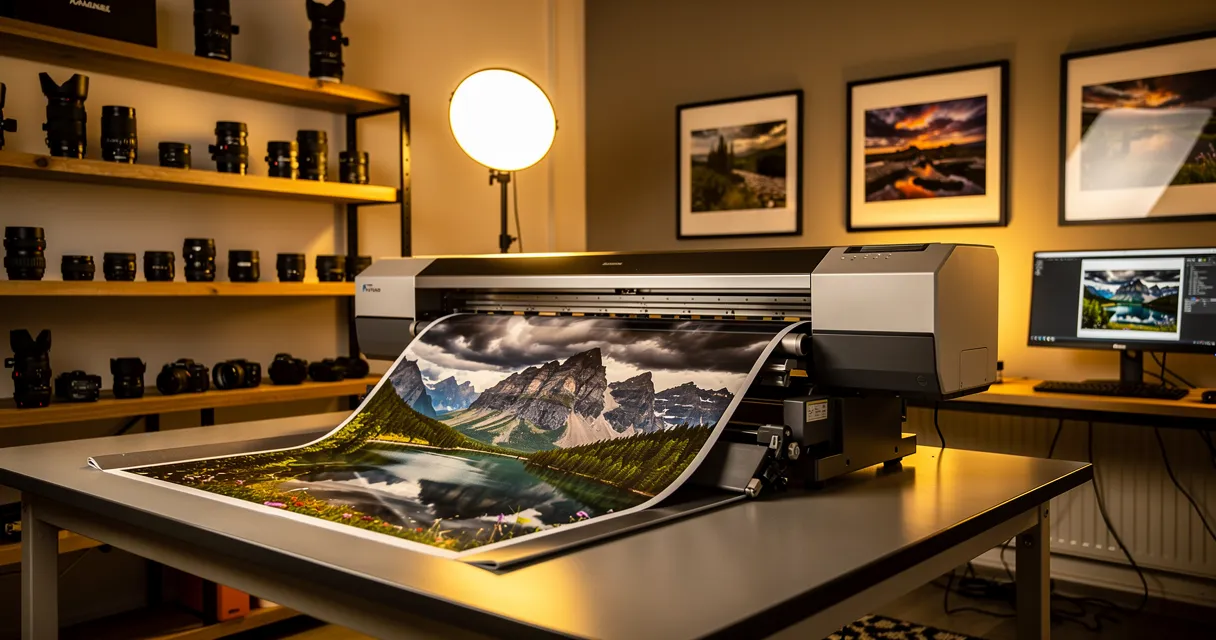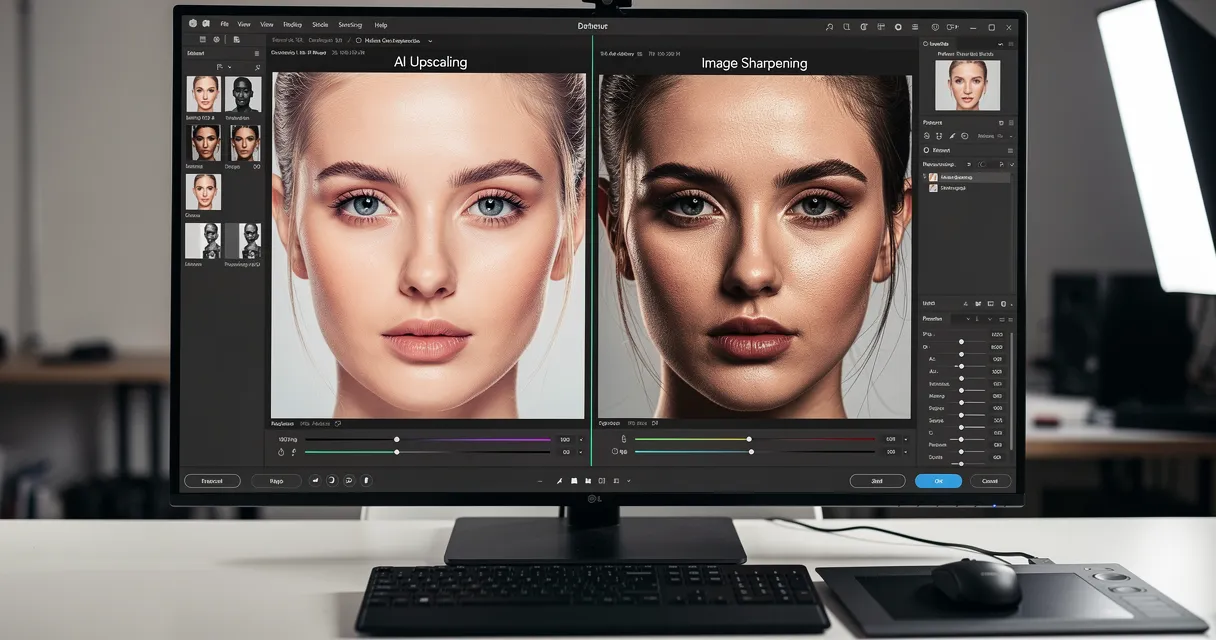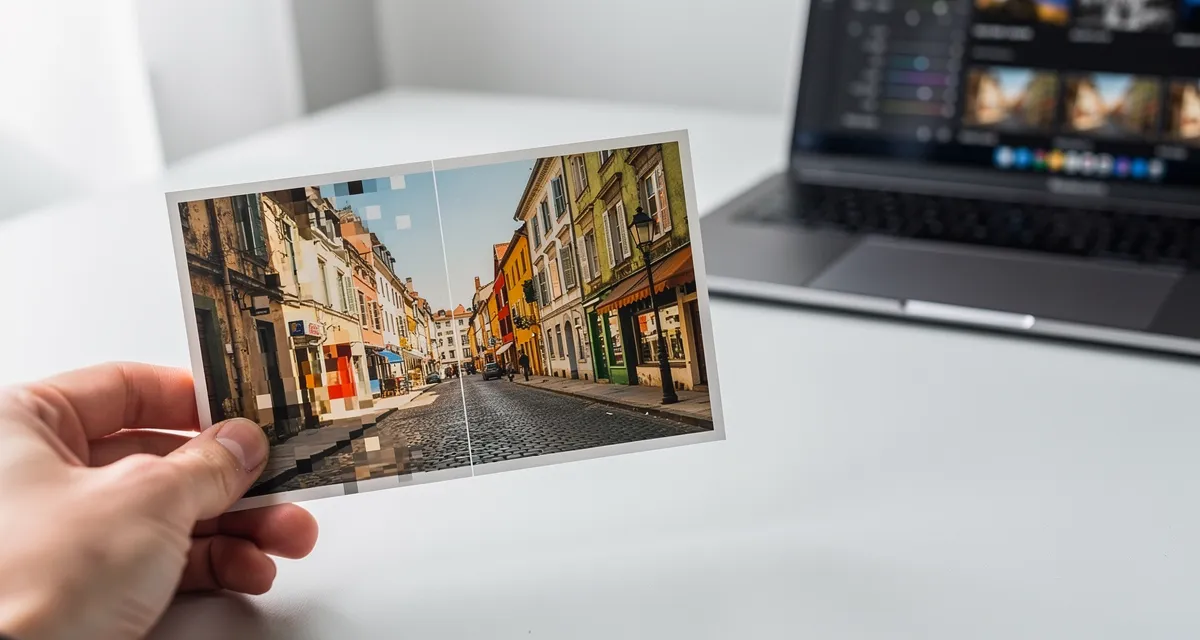
To fix pixelated photos, start by upscaling the image, then reduce blocky edges with AI sharpening or deblurring. Pixelation is usually a resolution problem, so a normal sharpen filter often makes the square edges harsher. The clean workflow is simple: identify why the photo became pixelated, enlarge it with an AI upscaler, check faces and edges at 100%, then export at the size you actually need.
Quick Fix: Repair a Pixelated Photo Online
If you came here because one photo looks blocky right now, use this short workflow first:
- Open the AI image upscaler.
- Upload the pixelated photo and choose 2x for web/social images or 4x for print, crops, and tiny originals.
- Download the result, then inspect faces, text, and edges at 100% before doing any extra sharpening.
Best first move: upscale before sharpening. Sharpening a small image first usually makes the square blocks more obvious.
Use this quick table before choosing a tool path:
| Cause | Best fix | Tool path |
|---|---|---|
| Small source image or thumbnail | AI upscaling before any sharpening | Upload to the AI upscaler, choose 2x or 4x, then export for web or print. |
| Heavy JPG compression | Upscale, then use light deblocking or denoise | Start with AI upscaling, check flat backgrounds, and avoid aggressive sharpening. |
| Cropped photo that lost detail | AI reconstruction plus face/detail check | Upscale the crop, compare faces and text at 100%, then keep the most natural version. |
| Pixelated print scan | Rescan if possible, then upscale | Scan at higher DPI when you can; otherwise upscale and export at the final print size. |
| Blurry and pixelated image | Deblur only after the upscale pass | Enlarge first, then apply mild AI sharpening or deblurring to avoid jagged halos. |
Want the fastest path? Upload the image to the free AI image upscaler, try 2x first, and switch to 4x if the photo still needs more printable resolution. No Photoshop workflow is required.
Try the AI image upscaler if you want to test a pixelated photo before reading the full guide. Upload once, compare the 2x and 4x result, then keep the cleaner export.

Try It Yourself
Upload your image and see the AI enhancement in action. Start with 10 free credits.
Understanding Why Your Photos Look Pixelated
Pixelation occurs when you enlarge a digital photo beyond its resolution limits, causing its individual pixels to become visible as squares. If you have ever tried to enlarge a small picture for a website banner or a print, you have likely encountered this issue.
This problem usually results from one of several key factors:
- Low-Resolution Source Image: A photo with small dimensions, such as 640x480 pixels, does not contain enough data to be enlarged cleanly. The pixel grid will become visible. You can learn more about this in our complete image resolution guide.
- Aggressive File Compression: Image formats like JPG reduce file size by discarding some image data. When compression is too high, it creates blocky artifacts that resemble pixelation, particularly in areas with smooth color transitions like skies or gradients.
- Incorrect Resizing Method: Basic image editors often use simple algorithms that enlarge existing pixels. This method adds no new detail and results in a soft, blocky appearance.
Distinguishing Pixelation from Blur
You must understand that pixelation and blur are two distinct problems. A blurry photo typically has sufficient resolution but lacks sharp focus. A pixelated photo, conversely, lacks resolution itself.
Attempting to sharpen a pixelated image will make it look worse. Sharpening algorithms enhance the edges of each square pixel, making the jagged effect more pronounced and degrading the image further.
Key Takeaway: You cannot fix pixelation by sharpening the image. The problem is a lack of image data, which requires an intelligent solution to reconstruct the missing detail.
Traditional Methods vs. Modern AI Solutions
For years, the options for fixing pixelated images were limited and often produced unsatisfactory results. AI-powered tools have fundamentally changed this. AI models analyze your photo’s content and generate new, convincing pixels to fill in the gaps as the image is enlarged. This process is called super-resolution.
The following explains the core technologies behind modern AI upscalers:
- Super-Resolution: This is the general term for using AI to increase an image's resolution. Instead of stretching pixels, the AI predicts what the missing details should look like and generates them.
- Generative Adversarial Networks (GANs): A GAN consists of two neural networks—a "generator" and a "discriminator"—that compete against each other. The generator creates new image data, and the discriminator judges its authenticity. This competition trains the generator to produce highly realistic details.
- Diffusion Models: These models work by adding noise to an image until it is pure static, then learning how to reverse the process. When you provide a low-resolution photo, the model uses its learned reversal process to "denoise" it back into a clean, high-resolution version.
Let's compare traditional methods with what modern AI can achieve.
Comparison of Resizing Methods
| Method | How It Works | Best For | Limitations |
|---|---|---|---|
| Traditional (Bicubic) | Stretches existing pixels and averages their colors to create a larger, smoother image. | Minor enlargements where some softness is acceptable. | Creates a blurry or "waxy" look; does not add any real detail. |
| Modern AI (Super-Resolution) | Uses trained neural networks (like GANs or diffusion models) to predict and generate new, realistic pixels. | Significantly enlarging photos while restoring fine details, text, and faces. | Cannot recover details from extremely small or heavily damaged images where no discernible content remains. |
The AI approach is superior for generating genuinely sharp and detailed results.
This is where a tool like MyImageUpscaler is effective. It is a web-based service, so you get direct access to this powerful AI technology without installing complex software like Adobe Photoshop. You can start immediately and receive 10 free credits to test the results on your own pixelated photos.
Diagnosing Your Image Before You Begin
Before you fix a low-quality photo, you must first understand why it is low-quality. Attempting to fix pixelation without a proper diagnosis can lead to frustration and may worsen the image. A quick analysis will help you select the correct tool for the task.
First, check the image's properties. On a PC, right-click the file and choose "Properties"; on a Mac, select "Get Info." Note the dimensions, such as 800x600 pixels. This number indicates the amount of data you are working with and helps determine if it is sufficient for your intended use, whether for a website header or a 4x6 print.
Identify the Root Cause
Not all image quality issues are the same. Most problems fall into one of three categories:
- True Pixelation: This occurs when you enlarge a small image too far, making its individual square pixels visible. The image lacks the necessary detail for the larger size.
- Compression Artifacts: These are blocky patterns or halos, common in JPEG files, that result from saving an image at a low quality to reduce its size. They are most noticeable in smooth areas like a blue sky.
- Digital Noise/Grain: This appears as a fine, sandy texture across the photo, usually caused by shooting in low-light conditions with a high camera ISO setting.
To distinguish between these issues, open the photo in an image viewer and zoom in to 100% or 200%. At this magnification, the problem will become clear. For example, sharpening a photo with heavy JPEG artifacts will only make the blocky patterns more prominent.
Key Insight: Choosing the right tool depends on your diagnosis. A denoiser will not fix a low-resolution image, and simple sharpening cannot add detail that was never present.
This decision tree can help you determine where to begin.

If an image is pixelated due to low resolution, an AI upscaler is your best first step. If the image has sufficient pixels but is soft or blurry, a standard sharpen tool may be all you need. Correctly identifying the problem at the start will lead to a better result.
Can AI Fix This Pixelated Photo?
Use this quick check before spending time on manual edits:
| What you see at 100% zoom | Best next step | Expected result |
|---|---|---|
| Clear subject, visible face, or readable shapes | Run a 2x or 4x AI upscale | Strong chance of a cleaner, sharper image |
| Blocky JPG squares in skies, walls, or gradients | Upscale, then use light denoise/deblock settings | Cleaner edges, but some compression marks may remain |
| Tiny thumbnail with no recognizable detail | Find a larger source if possible | AI can improve size, but it cannot recover exact lost detail |
| Pixelated text or logo | Use 4x upscaling and avoid face restore/denoise | Crisper edges and better readability |
This matters because the best CTR search result should answer the real question fast: yes, AI can often make a pixelated photo usable again, but the result depends on how much recognizable detail remains in the source file.
How to Fix Pixelated Photos with AI
In the past, fixing a pixelated image involved stretching it in an editor, which only enlarged the blocks and made the image blurrier. Today, AI upscaling offers a superior method. Instead of stretching pixels, AI rebuilds your photo by adding new, context-aware detail, creating a sharper and clearer version.
Web-based tools like MyImageUpscaler simplify this process. You do not need to install any software, as the most complex parts of the process are automated.

The technology is powered by sophisticated AI models—such as Generative Adversarial Networks (GANs) or Diffusion models—that have been trained on millions of high-resolution and low-resolution image pairs. The AI learns the patterns, textures, and details that define a high-quality photo. When you upload your pixelated image, the AI generates entirely new pixels that fit logically with the surrounding content, effectively recreating the lost detail.
This technology is driving a major shift in how professionals manage image quality. The AI image enhancement software market, valued at $709 million in 2023, is projected to reach $5.7 billion by 2033. This growth reflects the increasing reliance on AI to solve problems like pixelation that once required hours of manual editing. You can read more about the rapid expansion of the AI enhancement market to understand the scale of this trend.
How to Fix Your Pixelated Photos in 3 Steps
Using a tool like MyImageUpscaler is designed to be fast and intuitive. You can transform a blocky, unusable image into a professional-grade asset in just a few clicks. To follow these steps, you can visit the MyImageUpscaler tools page, where it is free to try with 10 free credits.
1. Upload Your Image and Choose a Scale
First, you will upload your pixelated image to the platform. Once uploaded, you need to decide how much you want to enlarge it. The most common choices are 2x and 4x.
- Choose 2x for a modest size increase, suitable for web use or small prints.
- Choose 4x to convert a small file into a high-resolution asset for large website headers, professional printing, or for cropping without losing quality.
For example, a small 600x400 pixel image becomes a much more useful 2400x1600 image at a 4x scale—providing sufficient resolution for most digital and print applications. Understanding this is important in many fields; even the best AI tools for real estate agents often emphasize upscaling for property photos.
2. Layer on Smart Enhancements
After selecting your scale factor, you can apply other AI-powered enhancements. These are not simple filters; they are separate AI processes that work together to address multiple quality issues simultaneously.
| Enhancement | What It Does | Best For... |
|---|---|---|
| Denoise | Removes digital noise and the grainy texture from photos taken in low light. | Any grainy photo where you want a cleaner, smoother finish. |
| Sharpen | Intelligently enhances fine details and edges without creating harsh, unnatural lines. | Adding crispness and clarity to images that feel slightly soft. |
| Face Restore | An AI model trained specifically to reconstruct facial features with high accuracy. | Essential for portraits or old family photos where faces are blurry or undefined. |
Combining these tools gives you precise control over the final result. For a more detailed explanation of how these functions work together, you can read our guide on how to improve image quality with AI.
3. Download and Inspect the Result
Once the AI has processed your image, you can download the new, high-resolution file. It is recommended to perform a side-by-side comparison with the original. Zoom in on key details, such as eyes in a portrait or text on a sign, to ensure the result meets your requirements.
Try these settings: for a small social image, start with 2x in the AI image upscaler. For a tiny image, crop, or print-bound photo, use 4x, then compare the download against the original at 100% zoom.
Limitation Acknowledgment: AI is powerful but has limitations. It cannot invent detail that was never present in the source image. If a photo is extremely small or a face is completely obscured, the AI has no information to work with. You will achieve the best results with source images that are low-resolution but still contain recognizable shapes and features for the AI to build upon.
See the Difference
Experience crystal-clear upscaling that preserves text, logos, and fine details.
Use this as the checkpoint: if your photo still looks blocky after the 2x test, rerun it at 4x and inspect faces, edges, and text at 100% zoom before applying any extra sharpening.
Tailoring Your Workflow for Different Photo Types
Fixing a pixelated photo is not a one-size-fits-all process. The best results come from adapting your approach to the content of the picture. A portrait has different requirements than a company logo, and an old family photo needs a unique touch to restore it properly.

Choosing the right tool for the job is essential. Understanding these different workflows will help you achieve professional, context-aware results instead of generic enhancements.
Workflow for Portraits and Headshots
When you fix a pixelated portrait, the primary goal is to make the face look clear and natural. You want the eyes, skin texture, and hair to be sharp but not artificial. Over-processing an upscale can create an unnatural "plastic" effect.
For portraits, use a workflow focused on gentle, targeted restoration. A web-based tool like MyImageUpscaler is well-suited for this, as it requires no installation.
1. Start with Face Restoration
Before adjusting the resolution, use a dedicated Face Restore feature. This is not a generic sharpener; it is an AI model trained specifically on millions of faces. It intelligently rebuilds eyes, noses, and mouths with high accuracy, providing a solid foundation for further enhancement.
2. Apply a Gentle Upscale
Next, apply a conservative upscale—usually 2x. The goal is to increase the resolution just enough to make the portrait sharp for web display or a small print, not to create a large poster.
3. Use Denoise Sparingly
If the original photo is grainy, a light application of the Denoise tool can be beneficial. Be cautious, as excessive denoising can remove natural skin texture, making the person look unrealistic. The aim is to reduce distracting digital noise while preserving the realistic details that make a portrait feel authentic.
Workflow for Graphics, Logos, and Text
With logos, diagrams, or any image containing text, the objective is different. Here, edge sharpness is critical. Any blurriness or compression artifacts can render text unreadable and turn clean lines into a fuzzy mess.
Your main objective for graphics is to achieve razor-sharp edges and clean lines. An AI model trained for this specific purpose will prevent the smudging and halo artifacts that general-purpose models can sometimes produce.
Follow this workflow for the best results:
- Select a "Graphics" or "Text" Model: If your tool offers specialized AI models, always choose the one designed for sharp lines. A tool like MyImageUpscaler can often detect the image type automatically and apply the appropriate model.
- Use a High Upscale Factor: Do not hesitate to use a 4x upscale. For graphics, a higher resolution almost always results in cleaner, crisper lines, which is especially important for vector-like images that need to scale perfectly.
- Avoid Denoise and Face Restore: These tools are not designed for graphics and can soften the very edges you are trying to sharpen. Use upscaling only.
Workflow for Old and Archival Photos
Restoring an old, damaged, or faded family photo is a more delicate process. These images often suffer from multiple issues simultaneously: pixelation from a low-resolution scan, color fading, physical scratches, and heavy film grain.
This multi-step approach is crucial. The field of computational photography is making significant progress in this area, driven by the same AI and machine learning that powers all modern image restoration. The global market is projected to reach $47.62 billion by 2033, largely due to these advanced capabilities. You can learn more about how AI is powering these market innovations.
1. Denoise and Remove Scratches First
Begin by cleaning up the image. Use a Denoise tool to reduce heavy film grain and an AI-powered scratch removal feature if available. Addressing these surface-level flaws first prevents the upscaler from unintentionally accentuating them.
2. Enhance Facial Details
Next, run the Face Restore function. For old portraits, this is often the most impactful step, bringing clarity back to the faces of loved ones and recovering details that seemed lost.
3. Upscale for Final Resolution
Finally, after the image is cleaned and the faces are restored, you can upscale it to your target size for printing or digital archiving. A 4x upscale is a good choice here, as it can transform a small original scan into a file suitable for a quality print.
Optimizing Your Enhanced Images for Web and Print
You have used AI to enhance your image, and it looks sharp. The final step is to prepare the new image for its intended destination. An image for a website requires different optimization than one intended for a high-quality print.
If this step is done incorrectly, you can negate your previous work.
Best Practices for Web Optimization
For any image that will be used online—on a blog, website, or social media—you must balance visual quality with file size. Large image files are a primary cause of slow-loading websites, which can frustrate visitors and negatively impact search engine rankings.
Your goal is to make the file as small as possible without a noticeable drop in quality.
- Choose a Modern Format: While JPG is still widely used, newer formats like WebP and AVIF offer superior compression, reducing file sizes by 25-50% compared to a JPG of similar quality. This significantly improves site speed.
- Resize Before You Upload: Never upload an image that is larger than its display size. If your website's content area is 800 pixels wide, resize your image to exactly 800 pixels wide before uploading. Using a 4000-pixel image and letting the browser shrink it wastes bandwidth.
This is highly relevant in the expanding photo-sharing market. Valued at $5,299.9 million in 2025, the market is projected to grow to $9,032.0 million by 2035, partly because AI editing tools are being integrated directly into sharing platforms. This trend highlights the demand for tools that create crisp, web-ready images quickly. You can learn more about how AI is driving growth in the photo-sharing industry and why smart optimization is critical.
Preparing Your Image for Print
When preparing an image for print, the priorities are different. File size is less of a concern; the most important factor is resolution, measured in Dots Per Inch (DPI).
The industry standard for high-quality printing is 300 DPI. If your image resolution is below this standard, the final print will likely appear soft, blurry, or pixelated, regardless of how sharp it looked on your screen.
To ensure your upscaled image is ready for printing, you must calculate the maximum print size based on its pixel dimensions. For example, a 2400x3000 pixel image can be printed at a maximum size of 8x10 inches. The calculation is straightforward: 2400px / 300 DPI = 8 inches.
Comparison of File Formats for Printing
| Format | Best For | Why It's Recommended |
|---|---|---|
| TIFF | Professional printing, archiving | This is a lossless format. It retains 100% of the image data without any compression, making it the best choice for preserving maximum quality. |
| High-Quality JPEG | General printing, photo labs | A JPEG saved at the highest quality setting (e.g., 10-12 in Photoshop) is a good compromise. It provides excellent detail with a more manageable file size. |
By upscaling your image to meet the 300 DPI requirement for your target print size, you ensure that the clarity achieved with AI is accurately reproduced on paper. To master this process, refer to our complete guide on how to upscale any image for 300 DPI printing.
If your end goal is printing, do not judge the image only on your phone screen. Upscale first, then confirm the final pixel dimensions against the print size. For example, an 8x10 inch print needs about 2400x3000 pixels at 300 DPI.
Frequently Asked Questions (FAQ)
Here are answers to some of the most common questions about fixing pixelated photos.
Can you truly unpixelate a photo?
The honest answer is no, you cannot "unpixelate" a photo in the sense of reversing the process to recover the original, lost data.
Instead, modern AI uses powerful algorithms to intelligently reconstruct the image. It analyzes the existing pixels and, based on its training on millions of photos, generates new, plausible details. The old, blocky pixels are replaced with new, AI-generated ones to create a sharp, high-resolution version of the image.
Why do my photos look pixelated on social media?
Social media platforms like Instagram and Facebook use aggressive compression algorithms on all uploaded images. This is how they ensure their sites load quickly for billions of users.
Even if your original photo was perfectly sharp, this compression process reduces the file size by discarding data, which often leads to blocky artifacts and a general loss of sharpness.
What is the best file format to avoid pixelation?
When saving your primary, edited files, you should always use a lossless format like PNG or TIFF. These formats preserve 100% of the image data every time you save the file, preventing any quality degradation.
When you are ready to publish the image online, converting it to a high-quality JPG or a modern format like WebP provides the best balance between image quality and small file size. After enhancing your photos, it is crucial to prepare them correctly for their final use. You can learn more about optimizing your images for web for speed and SEO.
Should I upscale a small photo or use it as is?
The decision depends on the intended use of the image. You should consider the final context.
If you are creating a website banner, a high-resolution social media post, or an image for a physical print, you must upscale it. This is the only way to meet modern quality standards and avoid a pixelated result. However, if the image will only be used as a small thumbnail or a minor decorative element, using it as-is may be sufficient.
Ready to see how AI can transform your pixelated photos? MyImageUpscaler is a completely web-based tool that delivers professional-grade results in seconds, with no software to install. Sign up today and get 10 free credits to start enhancing your images.

Reviewed byJoao Furtado
AI Image Upscaling Specialist
Joao is the founder of MyImageUpscaler and an AI image upscaling specialist. He tests every guide against real upscaling workflows — comparing model outputs, evaluating sharpness and artifact tradeoffs, and validating tool recommendations before publication.
- AI image upscaling
- Model comparison
- Photo restoration
- E-commerce image prep