![Image Resolution Guide: Everything You Need to Know [2026]](https://xqysaylskffsfwunczbd.supabase.co/storage/v1/object/public/blog-images/2026/01/1769887086886-resolution-featured.webp)
Image Resolution Guide: Everything You Need to Know
Resolution is confusing. DPI, PPI, megapixels, pixels per inch - the terminology is a mess. But understanding resolution is essential if you want your images to look good in print and on screen.
Here is everything you need to know, explained simply.
What Is Resolution?
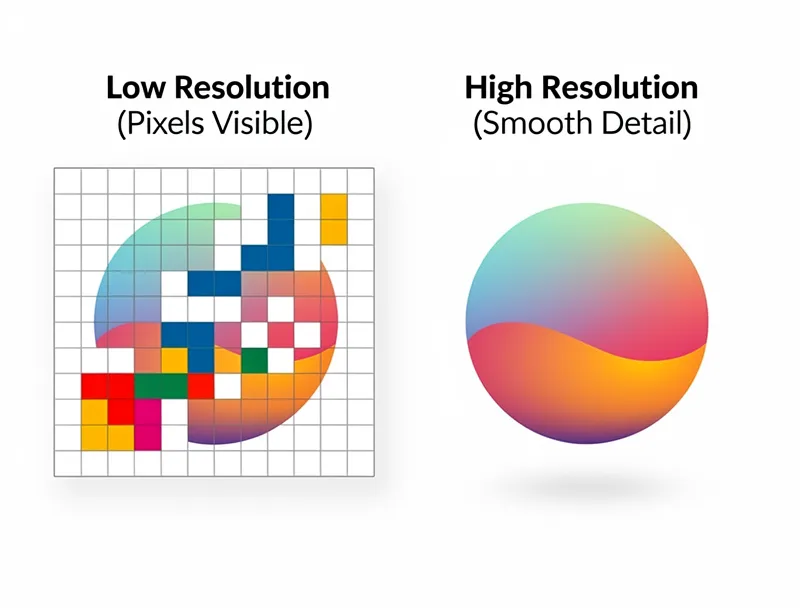
Resolution describes how much detail an image contains. More resolution means more detail.
For digital images, resolution is measured in pixels - the tiny dots that make up every image. A 1920x1080 image contains 1,920 pixels horizontally and 1,080 pixels vertically. Multiply them together: about 2 million pixels, or 2 megapixels.
Try the AI image upscaler if the resolution check shows your image is too small. Upscale first, then export for web, social, or print at the size you actually need.
Try It Yourself
Upload your image and see the AI enhancement in action. Start with 5 free credits.
Pixels, DPI, and PPI Explained
Pixels
Pixels are the building blocks of digital images. Each pixel is a single point of color. Zoom into any photo far enough and you see individual pixels.
More pixels means more detail. A 4000x3000 image (12 megapixels) shows finer detail than a 1000x750 image (0.75 megapixels).
PPI (Pixels Per Inch)
PPI describes how densely pixels are packed on a screen. Your phone might have 400+ PPI, packing pixels so tightly you cannot see them individually. An older monitor might have 100 PPI, where pixels are more visible.
PPI only matters for how images display on screens. Higher PPI screens show smoother edges and finer detail.
DPI (Dots Per Inch)
DPI is the print equivalent of PPI. It measures how many ink dots a printer places per inch of paper.
- 72 DPI: Too low for quality prints. Text looks fuzzy, images pixelated.
- 150 DPI: Acceptable for newspapers and quick drafts.
- 300 DPI: Industry standard for quality prints. Magazine quality.
- 600+ DPI: Ultra-high quality. Art prints, fine detail work.
The key formula:
Print size = Pixel dimensions ÷ DPI
A 3000x2000 pixel image at 300 DPI prints at 10x6.67 inches.
Resolution Requirements by Use Case
Social Media
Social platforms compress everything anyway, so you need good resolution but not excessive.
| Platform | Recommended | Minimum |
|---|---|---|
| Instagram Feed | 1080x1080 | 640x640 |
| Instagram Story | 1080x1920 | 750x1334 |
| Facebook Post | 1200x630 | 600x315 |
| 1200x675 | 600x335 | |
| 1200x627 | 552x289 |
Website Images
Balance quality against file size. Nobody wants to wait for slow-loading images.
| Use | Recommended | Notes |
|---|---|---|
| Hero image | 1920x1080 | Full-width sections |
| Blog image | 1200x800 | Standard content |
| Thumbnail | 400x400 | Preview images |
| Product photo | 1000x1000 | E-commerce standard |
| Background | 2560x1440 | Retina displays |
Print needs much higher resolution than screens. Always design for 300 DPI.
| Print Size | Pixels Needed (300 DPI) |
|---|---|
| 4x6 inches | 1200x1800 |
| 5x7 inches | 1500x2100 |
| 8x10 inches | 2400x3000 |
| 11x14 inches | 3300x4200 |
| 16x20 inches | 4800x6000 |
| 24x36 inches | 7200x10800 |
When Your Image Is Too Small
If your image does not have enough pixels, you have three options:
1. Accept lower quality
Print at a lower DPI. A 2400x3000 image intended for 8x10 at 300 DPI could print at 16x20 at 150 DPI. The quality will be noticeably worse up close but acceptable from a distance.
2. Find a higher resolution source
If you downloaded the image from somewhere, look for a higher resolution version. Stock photo sites often offer multiple sizes.
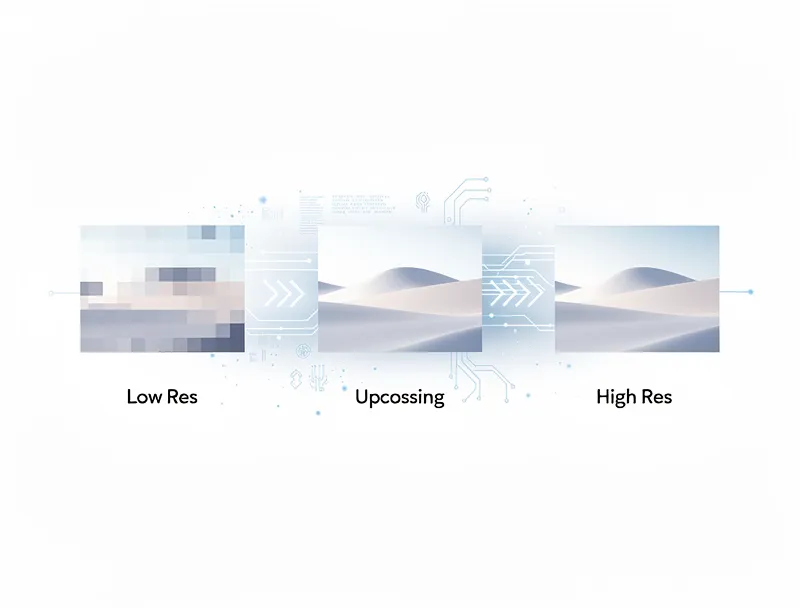
3. Upscale with AI
AI upscaling can add detail to low-resolution images. Upload your image and increase the resolution 2x or 4x while preserving quality.
This is the best option when you cannot get a larger source file.
See the Difference
Experience crystal-clear upscaling that preserves text, logos, and fine details.
If the pixel dimensions are below your target, test a 2x upscale first. Use 4x only when the image needs a larger print, crop, or high-resolution layout.
Common Resolution Mistakes
Mistake 1: Thinking DPI in digital files matters for screens
A 1000x1000 image displays exactly the same whether it is marked as 72 DPI or 300 DPI. The DPI setting in a digital file is just metadata. Screens care about pixel count, not DPI.
DPI only matters when printing.
Mistake 2: Enlarging images in Word or PowerPoint
Dragging image corners in documents does not add pixels. You are just stretching the same pixels over a larger area. The image gets blurrier.
Mistake 3: Using web images for print
That 800x600 image from a website looks fine on screen but prints at only 2.7x2 inches at 300 DPI. Way too small for most uses.
Mistake 4: Over-compressing images
JPEG compression destroys detail. Once compressed, you cannot get that detail back. Save master copies at high quality, compress only final deliverables.
How to Check Image Resolution
Windows
Right-click the image → Properties → Details tab. Look for "Dimensions" in pixels.
Mac
Select the image → File → Get Info. Or open in Preview → Tools → Show Inspector.
Online
Upload to any image tool. Most display dimensions immediately.
Calculating What You Need
For screens: Match the display dimensions. A 1920px-wide banner needs 1920 pixels wide.
For print: Multiply desired inches by 300.
- Want an 8x10 print? You need 2400x3000 pixels.
- Want a 24x36 poster? You need 7200x10800 pixels.
For upscaling: Our AI upscaler can increase resolution 2x, 4x, or 8x. A 1000x1000 image becomes 4000x4000 at 4x - enough for an 13x13 inch print at 300 DPI.
Quick Reference Card
Screen use: Match pixel dimensions to display size. 1920x1080 for full HD displays.
Social media: 1080-1200 pixels wide is the sweet spot.
Quality prints: 300 DPI minimum. Calculate: desired size in inches × 300 = pixels needed.
Large prints: 150-200 DPI acceptable for posters viewed from distance.
Image too small? Upscale with AI to add resolution without blur.
Summary
Resolution matters, but the rules are simple:
- For screens, pixel count is what matters
- For prints, calculate pixels needed at 300 DPI
- Do not enlarge images by dragging corners
- When resolution is insufficient, AI upscaling is the best solution
Try our free upscaler when your images need more resolution. It takes seconds and the quality difference is substantial.
Frequently Asked Questions
Quick answers for this guide
What should I know about image resolution everything you need to know []?+
Understand image resolution, DPI, PPI, and megapixels. Learn the right resolution for prints, web, and social media. Practical examples included. Start by confirming the target size, format, and platform requirements, then upscale only as much as needed to meet that target without introducing artifacts.
When should I use AI upscaling for this workflow?+
Use AI upscaling when the original image is too small for the target use case but still has enough detail to guide the model. For guides work, pay closest attention to source image quality, upscale settings, output dimensions, and final visual inspection, especially resolution, photo, tutorial.
How do I avoid losing quality after upscaling?+
Upscale once from the best original, avoid repeated compression, keep important text and edges sharp, and export in a format that matches the final use. If the output shows halos, smeared texture, or distorted text, reduce the upscale factor or use a cleaner source image.

Reviewed byJoao Furtado
AI Image Upscaling Specialist
Joao is the founder of MyImageUpscaler and an AI image upscaling specialist. He tests every guide against real upscaling workflows — comparing model outputs, evaluating sharpness and artifact tradeoffs, and validating tool recommendations before publication.
- AI image upscaling
- Model comparison
- Photo restoration
- E-commerce image prep