

![How to Convert Any Image to HD Quality with AI [2026]](https://xqysaylskffsfwunczbd.supabase.co/storage/v1/object/public/blog-images/2026/02/1771970605448-featured-convert-hd.webp)
How to Convert Any Image to HD Quality with AI
You have a photo that looks fine on your phone but turns into a blurry mess when you view it on a larger screen. Maybe it's a product shot from your old phone, a screenshot you need for a presentation, or a family photo you want to print. The problem is always the same: not enough pixels.
HD means more pixels — and you can't create them by just resizing. AI upscaling generates new detail that makes small images look genuinely sharp at larger sizes. Here's how to convert any image to HD quality free online.
What Does "HD Quality" Actually Mean?
HD (High Definition) refers to a specific resolution standard. Here's a quick breakdown:
- HD (720p): 1280 × 720 pixels
- Full HD (1080p): 1920 × 1080 pixels
- 2K: 2560 × 1440 pixels
- 4K Ultra HD: 3840 × 2160 pixels
Most images from older phones, screenshots, and web downloads fall well below HD resolution. A typical web image might be 640 × 480 pixels — less than half of HD. When you stretch that to fill a modern display or print it, you see every single pixel.
The goal of converting to HD is adding enough real detail to make the image look sharp at higher resolutions.
Why Simple Resizing Doesn't Work
You might think: "I'll just resize the image to 1920 × 1080 in Photoshop." That approach creates more pixels, but it doesn't create more detail. The software guesses what goes between existing pixels using basic math (bilinear or bicubic interpolation). The result? A larger image that's just as blurry — sometimes worse, because the blur is now spread across more pixels.
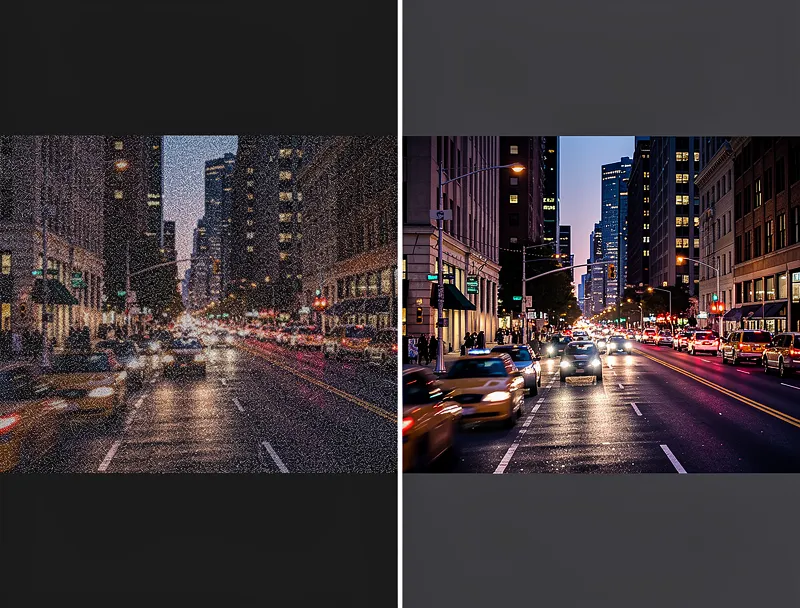
AI upscaling works differently. Instead of guessing with math, neural networks trained on millions of images predict what the missing detail should look like. Edges become sharper, textures gain definition, and faces look natural rather than smudged.
How to Convert Images to HD: Step by Step
Here's the fastest way to convert any image to HD quality:
Step 1: Open MyImageUpscaler
Go to MyImageUpscaler in your browser. No account needed — it works right away.
Step 2: Upload Your Image
Drag and drop your image or click to browse. The tool accepts JPG, PNG, WebP, AVIF, TIFF, and BMP formats. There's no minimum resolution requirement, so even tiny thumbnails work.
Step 3: Choose Your Scale
Select 2x or 4x upscaling depending on how much you need to enlarge. For converting a typical web image to Full HD, 2x is usually enough. For print or 4K displays, go with 4x.
Step 4: Download Your HD Image
The AI processes your image in seconds. Download the result and compare it to the original — the difference is immediately visible.
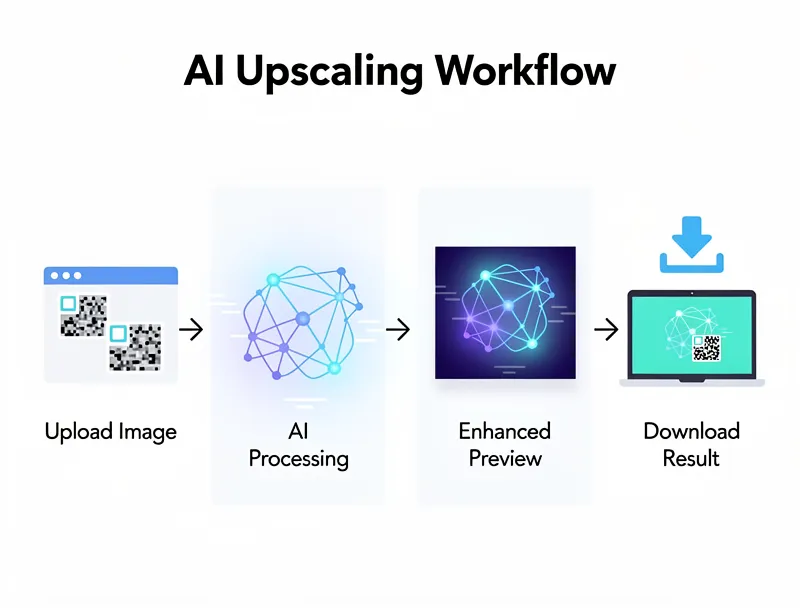
That's it. No software to install, no filters to tweak, no sliders to adjust.
When to Convert Images to HD
Not every image needs HD conversion. Here are the situations where it makes the biggest difference:
Printing Photos
Prints require 300 DPI (dots per inch) to look sharp. A 640 × 480 image only prints clearly at about 2 × 1.5 inches. Upscaling to HD lets you print at 6 × 4 inches or larger without visible pixels.
Social Media Content
Instagram recommends 1080 × 1080 for feed posts. Facebook prefers 1200 × 630 for shared images. If your source images don't meet these dimensions, AI upscaling gives platforms the resolution they need to display your content crisply.
E-commerce Product Photos
Amazon requires at least 1000 pixels on the longest side, but 2000+ pixels is recommended for the zoom feature. Upscaling older product photos saves you from reshooting everything.
Presentations and Documents
A pixelated screenshot in a slide deck or report makes you look careless. Converting screenshots and diagrams to HD takes seconds and gives your work a professional finish.
Restoring Old Photos
Scanned photos from the '90s and early 2000s are often 640 × 480 or smaller. AI upscaling can bring them to modern HD resolution while preserving the original character of the image.
Tips for the Best HD Conversion Results
AI upscaling is good, but you'll get better results with these practices:
-
Start with the highest quality source you have. If you have the original file, use it instead of a compressed copy from messaging apps or social media.
-
Don't over-upscale. Going from 320 × 240 straight to 4K asks the AI to invent too much. For very small images, do a 2x upscale first, then evaluate whether another pass is needed.
-
Check the format. PNG preserves more detail than heavily compressed JPEG. If your source is a JPEG with visible compression artifacts (blocky areas, especially in sky or gradients), the AI might amplify those.
-
Use the right scale factor. 2x doubles each dimension (and quadruples the pixel count). 4x gives you 16 times more pixels. Match the scale to what you actually need.
-
Compare before downloading. Zoom in on faces, text, and edges in the upscaled version. These areas show quality differences most clearly.
What AI Upscaling Can and Can't Do
Let's set realistic expectations:
It can:
- Sharpen blurry edges and textures
- Add convincing detail to low-res photos
- Make faces look natural at higher resolutions
- Handle most image formats
- Process images in seconds
It can't:
- Recover data that was never captured (e.g., text that was too small to read won't become legible)
- Fix severe motion blur or extreme out-of-focus shots
- Match the quality of a photo originally taken at high resolution
AI upscaling is enhancement, not magic. A 100 × 100 pixel image won't look like it came from a DSLR. But for most practical uses — printing, social media, presentations — the improvement is more than enough.
Convert Your First Image to HD
If you've read this far, you probably have an image in mind that needs upgrading. Try our AI upscaler and see the difference yourself. Upload your image, pick your scale, and download the HD result. It takes about 10 seconds, it's free, and you don't need to create an account.
Upload your image now and convert it to HD quality instantly.
Frequently Asked Questions
Quick answers for this guide
How do I convert any image to HD quality with AI []?+
Convert low-resolution images to HD quality in seconds using AI upscaling. Works with JPG, PNG, WebP, and more. Free online tool, no signup needed. Start with the highest-quality source file available, choose the smallest upscale factor that meets your target size, and inspect the result at 100% before publishing or printing.
When should I use AI upscaling for this workflow?+
Use AI upscaling when the original image is too small for the target use case but still has enough detail to guide the model. For guides work, pay closest attention to source image quality, upscale settings, output dimensions, and final visual inspection, especially upscale, AI, tutorial.
How do I avoid losing quality after upscaling?+
Upscale once from the best original, avoid repeated compression, keep important text and edges sharp, and export in a format that matches the final use. If the output shows halos, smeared texture, or distorted text, reduce the upscale factor or use a cleaner source image.

Reviewed byJoao Furtado
AI Image Upscaling Specialist
Joao is the founder of MyImageUpscaler and an AI image upscaling specialist. He tests every guide against real upscaling workflows — comparing model outputs, evaluating sharpness and artifact tradeoffs, and validating tool recommendations before publication.
- AI image upscaling
- Model comparison
- Photo restoration
- E-commerce image prep
![Upscale Image Online Free — No Sign Up, No Watermarks [2026]](https://xqysaylskffsfwunczbd.supabase.co/storage/v1/object/public/blog-images/2026/02/1771797822106-featured-online-upscaler.webp)