![How to Enhance Image Quality with AI: A Complete Guide [2026]](https://xqysaylskffsfwunczbd.supabase.co/storage/v1/object/public/blog-images/2026/02/1771367457696-featured-enhance-quality.webp)
How to Enhance Image Quality with AI: A Complete Guide [2026]
Poor image quality is a real problem. Blurry vacation photos, pixelated product shots, grainy screenshots — they all undermine the message you are trying to send. The good news: AI has solved this.
This guide walks you through exactly how to enhance image quality with AI, why it works better than traditional methods, and when to use each approach. No technical background required.
What Does "Enhance Image Quality" Actually Mean?
When people talk about image quality, they usually mean one or more of these things:
- Sharpness — how crisp the details look
- Resolution — how many pixels make up the image
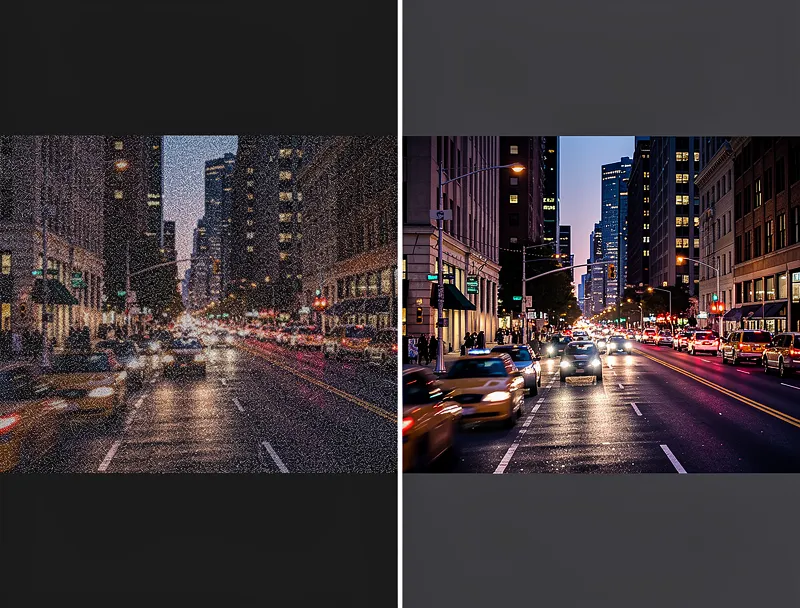
- Noise — grainy artifacts, especially in low-light photos
- Compression artifacts — blocky distortions from over-compressed JPEGs
- Color accuracy — muted, faded, or oversaturated tones
Traditional tools like Photoshop can address some of these manually. But AI does it automatically — and in most cases, better.
Why AI Outperforms Manual Editing for Image Enhancement
Classic upscaling and sharpening tools work by duplicating or averaging existing pixels. The result looks soft, over-sharpened, or plastic. You have seen it: images that look fine at small sizes but fall apart the moment you zoom in.
AI image enhancers take a different approach. They were trained on millions of image pairs — low quality and high quality — and learned to predict the detail that should be there. When you enhance an image with AI, the model is not just copying pixels. It is reconstructing them based on learned patterns.
That is why the results look natural. Fine textures, facial details, and edge clarity all improve without the telltale halos or artifacts of manual sharpening.
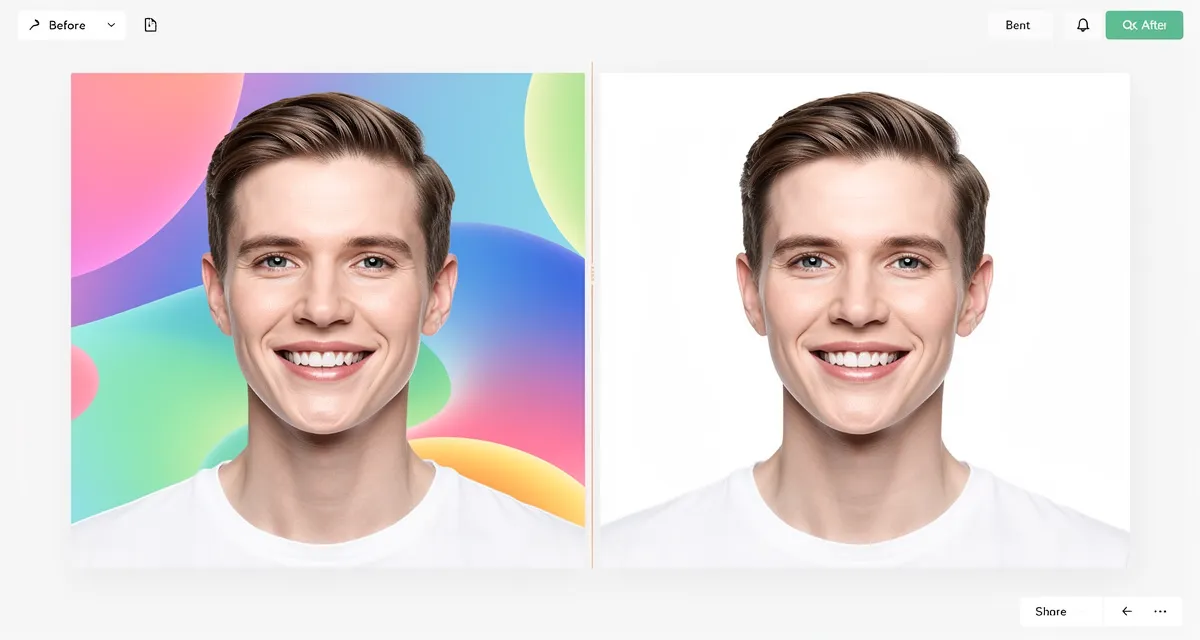
How to Enhance Image Quality with AI (Step by Step)
Here is the fastest way to do it — no software installation, no account required.
Step 1: Prepare Your Image
Start with the best version of the image you have. If you have multiple copies, use the largest. Avoid re-saving JPEGs multiple times since each save degrades quality further.
Supported formats for AI enhancement: JPEG, PNG, WebP, AVIF, BMP, TIFF.
Step 2: Open the AI Photo Enhancer
Go to the AI Photo Enhancer. This tool uses neural networks to sharpen, denoise, and restore fine detail in any photo.
Step 3: Upload Your Image
Drag and drop your file or click to browse. The tool accepts images up to 10MB. If your file is larger, compress it first without reducing dimensions.
Step 4: Choose Your Enhancement Level
Most images benefit from the default setting. For heavily degraded photos — very old scans, screenshots taken from video — you can push the enhancement higher.
Step 5: Download the Enhanced Image
Processing takes a few seconds. Download the result as a high-quality PNG or WebP file.
That is it. No sliders to adjust, no technical settings to configure.
When You Need to Upscale Instead of Just Enhance
Enhancement improves the quality of what is already there. But if your image is genuinely low-resolution — say, 200x200 pixels — you also need to upscale it.
Upscaling increases the physical dimensions of the image while AI fills in the new pixels intelligently. This is essential when:
- Printing an image larger than its original size
- Using a small image in a high-resolution context (4K display, presentation, billboard)
- Cropping into an image and needing the cropped section to remain sharp
For this, use the AI Image Upscaler. It enlarges images up to 4x while preserving — and actually improving — detail at the new size.
The two tools are complementary. Enhancement fixes quality issues at the current size. Upscaling increases size while maintaining quality. Many workflows benefit from both.
Common Use Cases for AI Image Enhancement
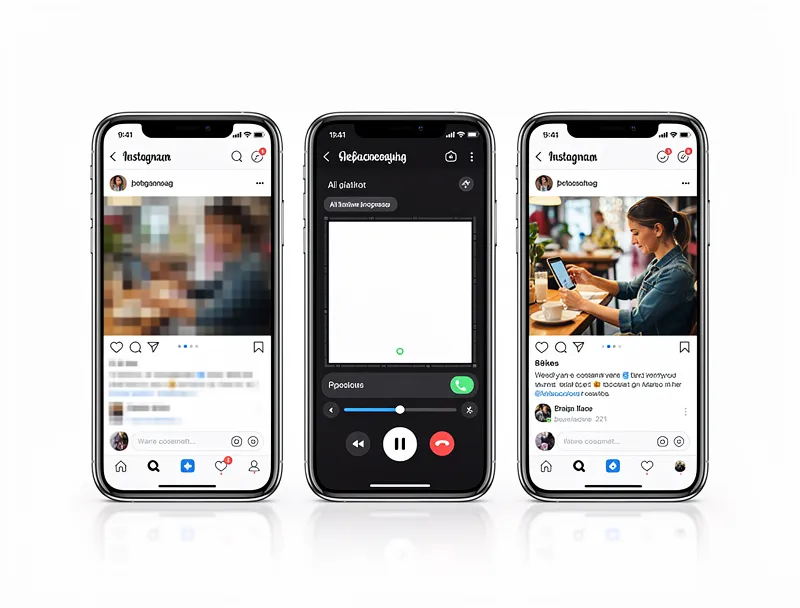
Social Media and Content Creation
Platform algorithms compress images automatically. Upload a high-quality enhanced image and the compression hits less hard. The result: sharper, more professional-looking posts compared to uploading unprocessed photos.
E-commerce Product Photography
Blurry product photos cost conversions. Studies consistently show that image quality is one of the top factors in online purchase decisions. Run your product shots through the AI Photo Enhancer before listing them.
Print and Physical Media
Printers work in DPI (dots per inch). A 72 DPI screen image looks terrible at print size. AI enhancement combined with upscaling brings images up to 300 DPI quality suitable for professional printing.
Old and Damaged Photos
Scanned family photos, film grain, faded colors — AI handles all of these well. The restoration models were trained specifically on this type of degradation.

AI Image Quality Enhancer Free: What to Expect
Free AI image enhancement does exist — and it works. The AI Photo Enhancer on this site is free to use with no signup required.
What you get for free:
- Full AI enhancement processing
- Download in PNG or WebP
- No watermarks
- Works on any device (mobile or desktop)
The quality is the same as paid tools because the underlying AI model is the same. The difference with paid tiers is volume — batch processing and higher file size limits.
For most people, the free version handles everything they need.
Tips for Getting the Best Results
Start with the original. If you still have the RAW file from your camera, use that. Converting RAW to JPEG before enhancement gives the AI more to work with.
Do not pre-sharpen. If your photo editing software has auto-sharpen on by default, turn it off before exporting for AI enhancement. Over-sharpened inputs produce over-sharpened outputs.
Watch for over-processing. AI enhancement is powerful but can smooth out intentional grain or texture in artistic photos. If the output looks too clean, dial back the enhancement level.
Enhance before upscaling. If you plan to both enhance and upscale, enhance first. This gives the upscaler cleaner input to work with, and the final result is noticeably better.
Frequently Asked Questions
Can AI really improve image quality?
Yes. Modern AI enhancement tools are trained on millions of image pairs and have learned to reconstruct fine detail, reduce noise, and sharpen edges in ways that manual editing cannot match. The results are especially strong on faces, textures, and photos with compression artifacts.
Is there a free AI image quality enhancer?
Yes. The AI Photo Enhancer is completely free — no account, no watermark, no usage limit for standard images. You upload your photo, the AI processes it, and you download the enhanced version.
What is the difference between enhancing and upscaling?
Enhancing improves quality at the existing resolution — sharper edges, less noise, better color. Upscaling increases the image dimensions (e.g., from 800x600 to 3200x2400) while keeping it sharp. You can do both: use the AI Photo Enhancer for quality, then the AI Image Upscaler for size.
Does AI enhancement work on old or damaged photos?
Very well. AI models trained on restoration tasks handle film grain, faded colors, compression artifacts, and scan noise effectively. Upload the best quality scan you can get and the AI will handle the rest.
How long does AI image enhancement take?
Processing typically takes 3–10 seconds per image. There is no queue or wait time on the free tier.
What image formats are supported?
JPEG, PNG, WebP, AVIF, BMP, and TIFF are all supported. The enhanced image can be downloaded as PNG or WebP.
Will AI enhancement make a blurry photo sharp?
It depends on the type of blur. AI handles compression blur, digital noise, and soft focus very well. Motion blur (a subject moving during exposure) is harder — the AI can improve it but cannot fully reverse it.
Conclusion
You do not need Photoshop, a degree in photo editing, or expensive software to enhance image quality. AI handles it in seconds and the results are consistently better than manual methods.
Try it now: Enhance your image with AI — free, no signup, results in seconds.
If your image also needs to be larger, the AI Image Upscaler works in the same way. Upload, process, download. Clean, sharp, ready to use.

Reviewed byJoao Furtado
AI Image Upscaling Specialist
Joao is the founder of MyImageUpscaler and an AI image upscaling specialist. He tests every guide against real upscaling workflows — comparing model outputs, evaluating sharpness and artifact tradeoffs, and validating tool recommendations before publication.
- AI image upscaling
- Model comparison
- Photo restoration
- E-commerce image prep

![Upscale Image Online Free — No Sign Up, No Watermarks [2026]](https://xqysaylskffsfwunczbd.supabase.co/storage/v1/object/public/blog-images/2026/02/1771797822106-featured-online-upscaler.webp)