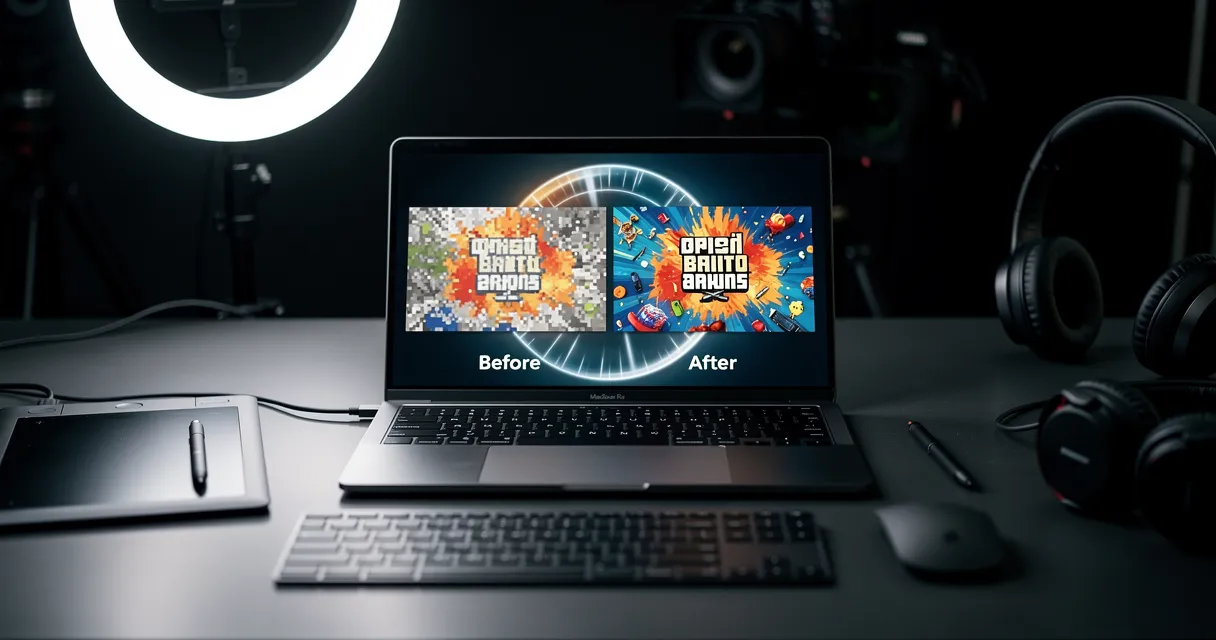
How to Upscale an Image in Photoshop: The Quick Answer
To upscale an image in Photoshop, open Image > Image Size, turn on Resample, choose Preserve Details 2.0, enter the target width or height, tune Reduce Noise, then click OK. For RAW, DNG, TIFF, or HEIC files, use Camera Raw > Enhance > Super Resolution instead.
Jump to the Photoshop method you need:
- Preserve Details 2.0 for JPEG, PNG, and WebP files
- Super Resolution for RAW, DNG, TIFF, and HEIC files
- Neural Filters and sharpening cleanup
- Batch processing in Photoshop
- Print sizing and 300 DPI exports
| Photoshop Method | Best File Type | Max Scale | Quality | Speed | When to Use |
|---|---|---|---|---|---|
| Preserve Details 2.0 | JPEG, PNG, WebP | Any manual size | Good edge preservation | Medium-slow | Standard raster images already opened in Photoshop |
| Super Resolution | RAW, DNG, TIFF, HEIC | Fixed 2x | Best built-in detail recovery | Medium | Camera Raw files and photo workflows |
| Neural Filters + sharpening | Any supported file | Cleanup only | Useful for faces and local fixes | Slow | After the main upscale when details still look soft |
| Actions / Image Processor | Batch folders | Depends on method | Consistent if settings are stable | Fast for repeat work | Repeating the same settings across many files |
How to Upscale an Image in Photoshop: The Quick Answer
Photoshop's best method depends on your file type:
- RAW, DNG, TIFF → Use Super Resolution in Camera Raw (AI-powered, 2x only)
- JPEG, PNG, WebP → Use Preserve Details 2.0 in Image Size dialog
- Any file, faster results → Use MyImageUpscaler (free, no Photoshop needed)
The table below summarizes when to use each:
| File Type | Recommended Method | Max Scale | Speed |
|---|---|---|---|
| RAW, DNG, TIFF | Super Resolution (Camera Raw) | 2x | Medium |
| JPEG, PNG | Preserve Details 2.0 | Any | Slow |
| Any format | MyImageUpscaler (free AI) | 4x | Fast |

How to Upsample Images in Photoshop with Preserve Details 2.0
When you are working with JPEGs and PNGs, Preserve Details 2.0 is Photoshop's best built-in resampling method for upscaling. It keeps edges sharp and controls noise while enlarging — a significant improvement over older Bicubic algorithms.
Step 1: Open the Image Size Dialog
Open your image in Photoshop. Navigate to Image > Image Size (or press Alt + Ctrl + I on Windows, Option + Command + I on Mac).
Step 2: Set Your Target Dimensions
In the Image Size window:
- Ensure the chain link icon between Width and Height is active (locks aspect ratio)
- Set your new dimensions in pixels (for web) or inches at 300 DPI (for print)
- For a 2x upscale: multiply both dimensions by 2
Step 3: Select Preserve Details 2.0 Resample Method
This is the critical step. Click the Resample dropdown and choose Preserve Details 2.0.
If you only see "Preserve Details (enlargement)" without the 2.0, you're on an older Photoshop version — consider updating for better results.
Step 4: Adjust the Reduce Noise Slider
After selecting Preserve Details 2.0, a Reduce Noise slider appears:
- Low-noise source (clean photo): 10–25%
- Average JPEG from camera: 30–50%
- Heavily compressed or noisy image: 60–80%
Zoom into a critical detail area and adjust until noise is reduced without sacrificing texture.

Click OK to apply.
How to Use Photoshop Super Resolution to Upscale RAW Files
Super Resolution in Adobe Camera Raw is Photoshop's most powerful upscaling tool — but it only works on RAW, DNG, TIFF, and HEIC files, and it only performs a fixed 2x upscale.
How to Apply Super Resolution in Photoshop
- Open your RAW file in Photoshop — it will open in Camera Raw automatically
- Right-click anywhere on the image preview
- Select Enhance... from the context menu
- Check Super Resolution in the Enhance dialog
- Review the preview (it shows the estimated output)
- Click Enhance — Photoshop creates a new DNG file with "-Enhanced" appended to the name
Processing time varies: a 24MP RAW file takes 30–90 seconds. The output quadruples the total pixel count (2x width × 2x height).
Super Resolution Limitations
- Fixed 2x scale only. You cannot do 4x in one step.
- RAW files only. Does not work on JPEG or PNG directly.
- Creates a new file. Does not modify the original.
- No control over the upscale. The AI decides how to fill in detail.
For more than 2x, or for JPEG/PNG files, Super Resolution is not the right tool.
How to Upscale a Photo in Photoshop for Print (300 DPI Guide)
Upscaling for print has a specific target: 300 DPI (dots per inch) at your desired print dimensions. Here's the workflow:
Calculate Your Required Pixels
Formula: Print width (inches) × 300 = Required pixel width
Examples:
- 4x6 inch print at 300 DPI = 1200 × 1800 pixels
- 8x10 inch print at 300 DPI = 2400 × 3000 pixels
- 11x14 inch print at 300 DPI = 3300 × 4200 pixels
Upscale for Print in Photoshop
- Open Image Size (Image > Image Size)
- Set units to Inches for Width and Height
- Enter your target print dimensions
- Set Resolution to 300 Pixels/Inch
- Ensure the chain link is locked (preserve aspect ratio)
- Set Resample to Preserve Details 2.0
- Click OK
If your source image is very small, you may need to upscale 4x or more. Photoshop's tools struggle with large upscale ratios. MyImageUpscaler handles 4x upscaling more cleanly on heavily compressed sources.
How to Resize an Image in Photoshop Without Losing Quality
The key to resizing without quality loss:
- Never downscale then upscale. Always work from the highest-resolution source available.
- Use the right algorithm. Bicubic Smoother for enlarging, Bicubic Sharper for reducing. Or Preserve Details 2.0 for best enlargement quality.
- Upscale incrementally for extreme ratios. If you need 8x, do two 4x passes with light sharpening between them. Results are cleaner than a single 8x pass.
- Post-process after upscaling. Apply noise reduction then Smart Sharpen to finish.
How to Upscale an Image in Photoshop Using Bicubic Methods
For older Photoshop versions without Preserve Details 2.0, Bicubic algorithms are the fallback:
- Bicubic Smoother — best for enlargement, softer result
- Bicubic Sharper — best for reduction, can over-sharpen when enlarging
- Bicubic (smooth gradients) — general purpose
Bicubic Smoother + Smart Sharpen afterward is a reasonable workflow when Preserve Details 2.0 is unavailable. Results won't match modern AI tools but are better than Nearest Neighbor or Bilinear.
How to Upscale an Image in Photoshop Using Neural Filters
Photoshop's Neural Filters include an Image Upscale option in newer versions (CC 2023+). To access it:
- Go to Filter > Neural Filters
- Find Image Upscale in the filter list
- Enable it and select your upscale factor
- Click OK
Neural Filters require an internet connection (processing happens in Adobe's cloud). Quality is comparable to Preserve Details 2.0 for clean sources.

Photoshop vs. MyImageUpscaler: Honest Comparison
Photoshop is a comprehensive photo editor. MyImageUpscaler is built specifically for AI upscaling. Here's how they compare on what actually matters for upscaling tasks:
| Feature | Photoshop | MyImageUpscaler |
|---|---|---|
| Upscale quality (JPEG/PNG) | Good (Preserve Details 2.0) | Better — specialized AI model |
| Upscale quality (RAW) | Excellent (Super Resolution) | Good — handles most formats |
| Max upscale factor | 2x (Super Res) / any (PD 2.0) | 4x in one pass |
| Speed | Slow (30s–3min per image) | Fast (5–15s per image) |
| Batch processing | Manual, one at a time | Yes — multiple images at once |
| No Photoshop required | No — needs full CC subscription | Yes — works in any browser |
| Free to use | No — $20+/month minimum | Yes — try free, no signup |
| Works on mobile | Limited | Yes — any device |
| Compressed JPEG handling | Amplifies artifacts | Cleans artifacts during upscale |
When Photoshop Wins
- You're already in Photoshop doing other edits and want a quick resize
- You're working with RAW files and want Super Resolution's 2x AI upscale
- You need fine manual control over every step of post-processing
- You're doing professional retouching alongside the upscale
When MyImageUpscaler Wins
- You need faster results (5–15 seconds vs. 1–3 minutes)
- You have multiple images to upscale at once
- You don't have Photoshop or don't want to open it for a simple task
- Your source is a heavily compressed JPEG (Photoshop amplifies artifacts; AI tools clean them)
- You want 4x in a single pass (Photoshop Super Resolution caps at 2x)
- You're on mobile or a computer without Photoshop installed
Try MyImageUpscaler free — no signup required, no watermark, results in seconds.
Post-Upscaling Workflow in Photoshop: Denoise Then Sharpen
Upscaling amplifies existing problems. Here's the right order for post-processing:
Rule: Denoise first. Sharpen second.
Sharpening first then denoising sharpens the noise and bakes it in. Always denoise first.
Step 1: Reduce Amplified Noise with Camera Raw Filter
- Convert your upscaled layer to a Smart Object (right-click > Convert to Smart Object)
- Go to Filter > Camera Raw Filter
- Open the Detail tab
- Adjust the Luminance noise reduction slider — aim to reduce grain without creating a waxy look
- Zoom to 100% to evaluate the effect accurately
Step 2: Apply Smart Sharpen
After denoising, restore crispness with Smart Sharpen (Filter > Sharpen > Smart Sharpen):
- Amount: 100–150% as a starting point
- Radius: 0.8–2.0 pixels (keep low to avoid halos)
- Reduce Noise: 10% or less (you already handled noise in step 1)
The goal is to enhance perceived sharpness, not create artificial detail.

How to Upscale Multiple Images in Photoshop (Batch Upscaling)
Photoshop can batch-process images using Actions and Batch:
- Record an Action: Go to Window > Actions. Create a new action and record your upscaling steps.
- Stop Recording: Stop the action after applying upscaling settings.
- Run Batch: Go to File > Automate > Batch. Select your action and the folder of images.
This works but is slow — Photoshop processes images one by one on your CPU.
Faster alternative: MyImageUpscaler's batch processing handles multiple images simultaneously in the cloud. What takes 30 minutes in Photoshop Batch takes 2 minutes in a browser.
How to Upscale Low-Resolution Images in Photoshop
Very low resolution images (under 200x200 pixels) are the hardest to upscale cleanly in Photoshop. Photoshop's algorithms — even Preserve Details 2.0 — struggle because there's simply not enough original data to work with.
For low-res images:
- Set expectations. A 100px thumbnail will not become a usable 1600px image regardless of the tool.
- Use AI upscaling. Dedicated AI models like MyImageUpscaler handle low-res sources better than Photoshop by hallucinating plausible detail.
- Apply noise reduction before upscaling. Remove artifacts from the compressed source before enlarging them.
How to Upscale an Image in Photoshop for Instagram, Etsy, and Amazon
For Instagram (recommended: 1080x1080 or 1080x1350)
- Open Image Size, set width to 1080px minimum
- Use Preserve Details 2.0
- Export as JPEG at 85%+ quality
For Etsy Listings (recommended: 2000x2000 minimum)
Etsy recommends at least 2000px on the shortest side. If your product photo is 500x500:
- 4x upscale gets you to 2000x2000
- Photoshop Preserve Details 2.0 works, but may struggle
- AI upscaling gives cleaner results on product photography
For Amazon (main image: 1600px minimum, 2000px+ recommended)
Amazon's main image requirements: white background, 85% of frame, 2000px+ on longest side. If your product shots are too small, a 4x upscale gets most images into compliance.
Keyboard Shortcuts for Upscaling in Photoshop
| Action | Windows | Mac |
|---|---|---|
| Open Image Size | Alt + Ctrl + I | Option + Cmd + I |
| Open Camera Raw | Shift + Ctrl + A | Shift + Cmd + A |
| Smart Sharpen | (none — use menu) | (none — use menu) |
| Undo last action | Ctrl + Z | Cmd + Z |
| Zoom to 100% | Ctrl + 1 | Cmd + 1 |
Frequently Asked Questions: Photoshop Upscaling
How do I upscale an image in Photoshop without it getting blurry?
Use Preserve Details 2.0 (Image > Image Size > Resample dropdown) for JPEG and PNG files. For RAW files, use Super Resolution in Camera Raw. After upscaling, apply Smart Sharpen to restore crispness. If you need 4x+ upscaling without blur, MyImageUpscaler's AI handles it more cleanly than Photoshop's built-in tools.
What is the best way to upscale in Photoshop?
The best method depends on your file type. For RAW/DNG files, Super Resolution in Camera Raw produces the best quality. For JPEG/PNG, Preserve Details 2.0 in the Image Size dialog is the top choice. For anything that needs 4x upscaling or batch processing, a dedicated AI tool is faster and often produces better results.
How does Photoshop Preserve Details 2.0 work?
Preserve Details 2.0 is an AI-assisted resampling algorithm. When you enlarge an image, it analyzes edges and textures to fill in new pixels more intelligently than older bicubic methods. The Reduce Noise slider lets you balance between preserving sharp edges and eliminating digital grain. It was introduced in Photoshop CC 2018.
Can I upscale an image 4x in Photoshop?
Yes, using Preserve Details 2.0 in Image Size. However, Super Resolution (Camera Raw) caps at 2x. For 4x enlargement in Photoshop, you can either do it in one step with Preserve Details 2.0 (quality may suffer) or do two consecutive 2x passes with light sharpening between passes. Alternatively, MyImageUpscaler does 4x in one clean pass specifically trained for that ratio.
What is upsample in Photoshop?
Upsampling is Photoshop's term for enlarging an image — adding new pixels to increase dimensions. The opposite is downsampling (reducing image size). When you upscale in Photoshop's Image Size dialog, you are upsampling. The quality depends heavily on the Resample method you choose.
Does Photoshop Super Resolution work on JPEGs?
No. Super Resolution in Camera Raw only works with camera RAW formats — RAW, DNG, TIFF, and HEIC files. For JPEG and PNG files, use Preserve Details 2.0 in Image Size instead. If you want AI-quality upscaling on a JPEG, MyImageUpscaler is specifically built for that use case.
How do I upscale a logo in Photoshop?
Logos are often vector-based (AI, EPS, SVG). For vector logos, re-export at the target size from the original vector file — no upscaling needed. For raster logo files (PNG, JPEG), use Preserve Details 2.0 in Photoshop. For logos with text, the AI upscaler is particularly good at preserving sharp text edges.
Why does my image look pixelated after upscaling in Photoshop?
Pixelation happens when you upscale a very small image too aggressively. The software makes existing pixels larger rather than generating new detail. To fix this: use AI upscaling (Photoshop Super Resolution or a dedicated tool), reduce the upscale factor, or accept that very small originals have limited potential. Starting with the highest-resolution original available always produces better results.
What resolution should I upscale to for printing?
For professional print quality, target 300 DPI at your final print dimensions. Formula: print width (inches) × 300 = required pixel width. An 8×10 inch print at 300 DPI requires 2400 × 3000 pixels. If your source image is too small, a 4x upscale via MyImageUpscaler often gets close to print-ready quality.
Is MyImageUpscaler better than Photoshop for upscaling?
For most upscaling tasks — especially JPEG/PNG at 4x, batch jobs, or fast single images — yes. MyImageUpscaler uses a specialized AI model trained specifically for upscaling, processes images in 5–15 seconds, and is free to try without signing up. Photoshop is better when you need Super Resolution's 2x AI upscale on RAW files, or when you're already doing extensive editing in Photoshop and a quick resize is part of that workflow.
How do I upscale an old or damaged photo in Photoshop?
Old photos often have multiple problems beyond just low resolution — scratches, fading, noise, and compression artifacts. For best results: use AI upscaling first (it cleans artifacts during upscaling), then do targeted retouching in Photoshop (healing brush, clone stamp). Photoshop first then upscaling often amplifies existing damage.
The Bottom Line: Which Should You Use?
If you need to upscale a RAW file and you already have Photoshop open, Super Resolution is hard to beat. For everything else — faster processing, 4x upscales, batch jobs, JPEG sources, or working without Photoshop — a dedicated free AI tool delivers better results with less effort.
Try MyImageUpscaler free — no signup, no watermark, results in under 15 seconds. Compare it to Photoshop on your own images and see the difference.

Reviewed byJoao Furtado
AI Image Upscaling Specialist
Joao is the founder of MyImageUpscaler and an AI image upscaling specialist. He tests every guide against real upscaling workflows — comparing model outputs, evaluating sharpness and artifact tradeoffs, and validating tool recommendations before publication.
- AI image upscaling
- Model comparison
- Photo restoration
- E-commerce image prep