

That shoebox of old family photos in your closet holds priceless memories—but time hasn't been kind to them. Faded colors, scratches, low resolution from early digital cameras, or tiny prints that don't translate well to modern screens. You don't need to accept that these memories are locked in the past.
AI photo restoration has made it possible for anyone to breathe new life into old images without expensive software or professional skills. Tools purpose-built for photo restoration can add genuine detail to faces and textures that were never visible in the original print.
Why Old Photos Need Special Treatment
Old photographs face unique challenges that standard editing can't solve:
Common Issues in Old Photos
| Problem | Cause | Traditional Fix | AI Solution |
|---|---|---|---|
| Low resolution | Small prints, early digital | Blur when enlarged | Intelligent detail addition |
| Faded colors | UV exposure, age | Manual color correction | Automatic restoration |
| Physical damage | Scratches, tears, water | Hours of cloning | Pattern-based repair |
| Noise/grain | Old film, poor lighting | Smoothing (loses detail) | Detail-preserving denoising |
The Resolution Problem
Most old printed photos, when scanned, produce images around 300-600 pixels wide. For modern use, you need:
- Social media: 1080px minimum
- Digital frames: 1920px for HD displays
- Reprinting: 3000px+ for quality 8x10 prints
Traditional upscaling can't bridge this gap without severe quality loss.
How AI Photo Restoration Works
Unlike simple filters or manual editing, AI restoration uses machine learning to understand what your photo should look like.
The Technology Behind It
- Pattern Recognition: The AI identifies faces, textures, objects, and text
- Training Data: Models learn from millions of high-quality images
- Intelligent Prediction: Missing or damaged areas are reconstructed based on context
- Detail Generation: New pixels are created that look natural, not interpolated

Try It Yourself
Upload your image and see the AI enhancement in action. Start with 5 free credits.
Step-by-Step: Restoring Your Family Photos
Step 1: Digitize Your Photos Properly
The quality of your restoration depends on your scan quality.
Scanning Recommendations:
- Resolution: 600 DPI minimum, 1200 DPI for small prints
- Format: TIFF or PNG (not JPEG for master copies)
- Color depth: 24-bit color or 16-bit grayscale
- Clean the scanner: Dust shows up at high resolution
For phone scanning:
- Use good lighting (natural, indirect)
- Keep the phone parallel to the photo
- Use a scanning app for automatic cropping and correction
Step 2: Basic Cleanup (Optional)
Before AI enhancement, consider quick fixes:
- Crop: Remove damaged borders
- Rotate: Correct slight tilts
- Remove obvious spots: Large dust marks or stains
However, AI can often handle these automatically, so don't spend hours on manual cleanup.
Step 3: AI Enhancement
Using myimageupscaler.com for restoration:
- Upload your scanned photo
- Select 2x or 4x upscale depending on starting resolution
- Process (typically 30-60 seconds)
- Download your enhanced image
Step 4: Final Adjustments
After AI enhancement, you may want to:
- Adjust contrast: Old photos often need slight contrast boost
- Color correction: Fix remaining color cast issues
- Selective sharpening: Enhance faces or key details
Before and After: What to Expect
Here's what AI restoration can achieve:
| Before | After |
|---|---|
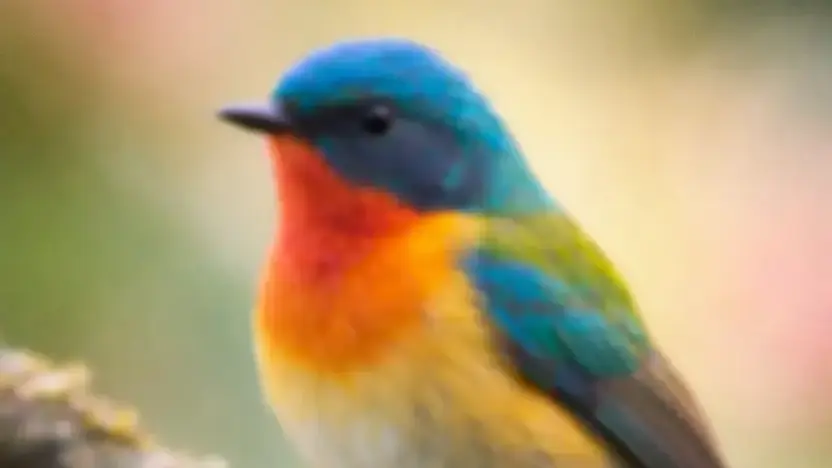 | 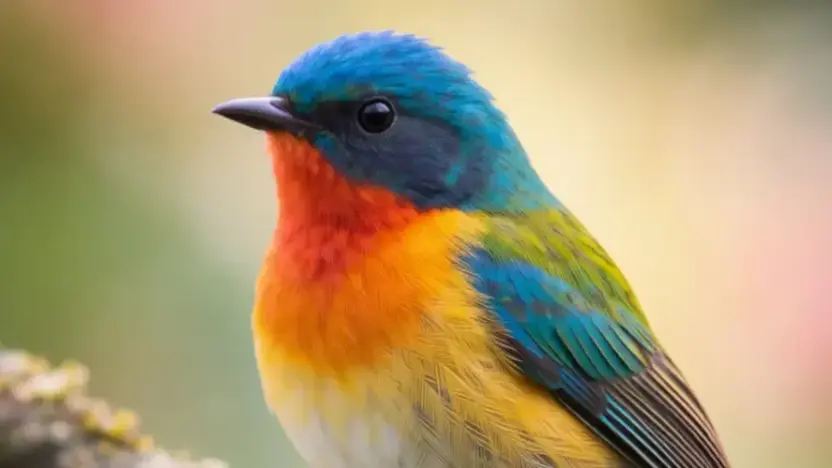 |
Notice the difference in facial detail, hair definition, and overall clarity. The AI doesn't just enlarge—it enhances.
See the Difference
Experience crystal-clear upscaling that preserves text, logos, and fine details.
Best Practices for Different Photo Types
Portrait Photos
Portraits benefit most from AI enhancement because faces are well-understood by modern AI:
- Focus on faces: Ensure faces are in the sharpest part of your scan
- Don't over-process: Subtle enhancement preserves period character
- Watch for artifacts: Check eyes and teeth for unnatural sharpening
Group Photos
Large group shots are challenging due to small face sizes:
- Scan at maximum resolution: You'll need every pixel
- Consider 4x upscaling: Small faces need more enhancement
- Accept some limitations: Very small faces may not fully resolve
Landscape and Location Shots
Vacation photos and scenery respond well to AI:
- Textures improve dramatically: Foliage, buildings, water
- Architecture sharpens: Windows, signs, details become clearer
- Watch the sky: AI may add unwanted texture to smooth gradients
Photos with Text
Old photos often include signs, documents, or captions:
Common Mistakes to Avoid
Over-Processing
Mistake: Running the same photo through AI enhancement multiple times.
Why it's bad: Each pass adds artificial detail. After 2-3 passes, faces look uncanny and textures become repetitive.
Solution: One high-quality pass is better than multiple attempts.
Wrong Source Quality
Mistake: Using a low-quality scan or phone photo of a photo.
Why it's bad: AI can't recover detail that was never captured.
Solution: Re-scan at higher resolution, or accept limitations.
Ignoring Original Character
Mistake: Removing all grain and imperfections from vintage photos.
Why it's bad: Some character comes from the era's photographic style.
Solution: Aim for "enhanced" not "modern looking."
JPEG Compression
Mistake: Saving your scans as compressed JPEGs before enhancement.
Why it's bad: JPEG artifacts get amplified during AI processing.
Solution: Keep master copies in PNG or TIFF format.
Preserving Your Restored Photos
After restoration, protect your work:
Digital Preservation
- Master copies: Keep highest quality versions (PNG/TIFF)
- Web versions: Create smaller JPEGs for sharing
- Cloud backup: Store in multiple locations
- Metadata: Add dates, names, and locations to file info
Physical Reprints
Your restored photos can now be printed at sizes impossible with the originals:
| Original Size | Restored Max Print |
|---|---|
| 2x3 inch | 8x12 inch |
| 4x6 inch | 16x24 inch |
| Wallet size | 5x7 inch |
Use archival paper and inks for reprints you want to last.
What AI Can and Cannot Do
AI Excels At:
- Increasing resolution intelligently
- Enhancing facial features and details
- Improving overall sharpness and clarity
- Reducing noise while preserving detail
- Reconstructing missing textures
AI Struggles With:
- Severely damaged areas (large tears, missing sections)
- Completely overexposed or underexposed regions
- Faces that are extremely small or blurred
- Reconstructing specific, unknown details
- Matching exact historical photographic styles
Getting Started with Photo Restoration
Ready to restore your family memories? Here's your action plan:
- Gather your photos: Collect the ones most important to you
- Prioritize: Start with your most meaningful images
- Scan properly: Use the settings recommended above
- Enhance: Upload to myimageupscaler.com for AI enhancement
- Share: Print, frame, or share digitally with family
The memories in those old photos deserve to be seen clearly. AI restoration makes it possible for anyone to preserve and share their family history in stunning quality.
Ready to Transform Your Images?
Start with 5 free credits. No credit card required. Cancel anytime.
View PricingFrequently Asked Questions
Quick answers for this guide
How do I restore old photos with AI?+
Learn how to restore and enhance old, faded, or damaged photos using AI technology. Bring family memories back to life with modern upscaling. Start with the highest-quality source file available, choose the smallest upscale factor that meets your target size, and inspect the result at 100% before publishing or printing.
When should I use AI upscaling for this workflow?+
Use AI upscaling when the original image is too small for the target use case but still has enough detail to guide the model. For tutorials work, pay closest attention to source image quality, upscale settings, output dimensions, and final visual inspection, especially photo restoration, old photos, AI enhancement.
How do I avoid losing quality after upscaling?+
Upscale once from the best original, avoid repeated compression, keep important text and edges sharp, and export in a format that matches the final use. If the output shows halos, smeared texture, or distorted text, reduce the upscale factor or use a cleaner source image.

Reviewed byJoao Furtado
AI Image Upscaling Specialist
Joao is the founder of MyImageUpscaler and an AI image upscaling specialist. He tests every guide against real upscaling workflows — comparing model outputs, evaluating sharpness and artifact tradeoffs, and validating tool recommendations before publication.
- AI image upscaling
- Model comparison
- Photo restoration
- E-commerce image prep


