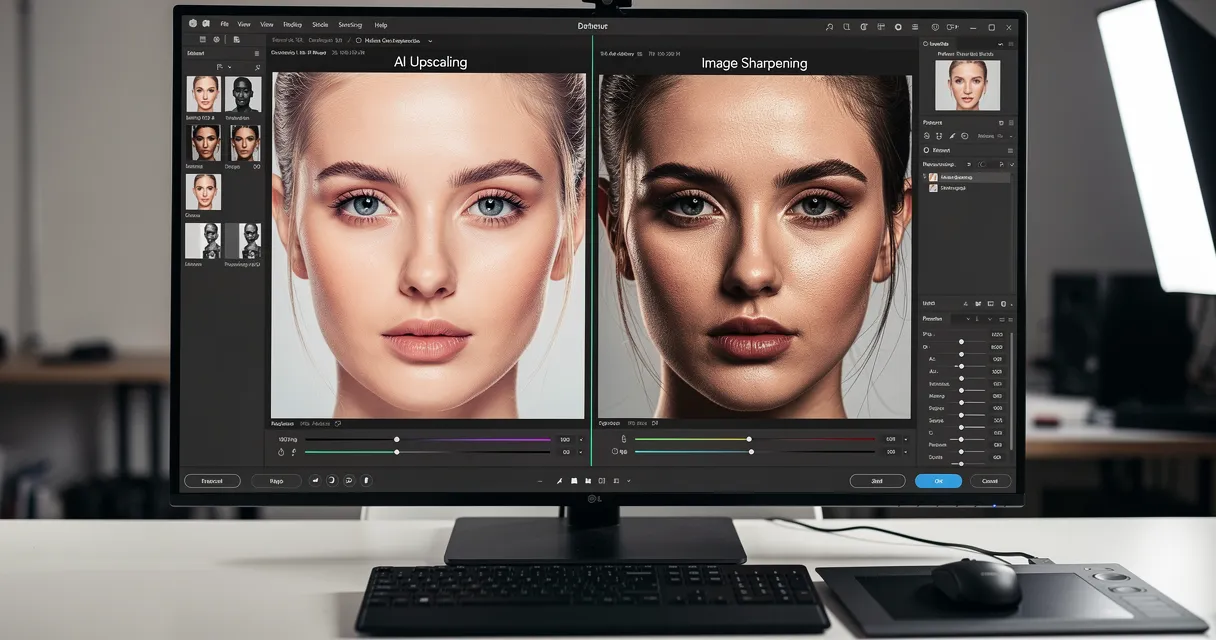
AI Upscaling vs Sharpening Explained: Key Difference
AI upscaling vs sharpening explained: upscaling adds new resolution and detail, while sharpening makes existing edges look clearer. Upscaling increases resolution by generating pixels; sharpening keeps the same pixel count and boosts edge contrast. Use upscaling when an image is too small, and sharpening when it is already large enough but looks soft.
Quick answer: AI upscaling creates a larger image by adding new pixels and reconstructing missing detail. Sharpening does not increase resolution; it increases local contrast around existing edges. If you need a bigger print, display, or crop, upscale first. If the size is right but details look soft, sharpen lightly.
AI Upscaling vs Sharpening Comparison
| Question | AI upscaling | Sharpening |
|---|---|---|
| Main job | Adds pixels and increases resolution | Clarifies existing edges |
| Best use | Small images, cropped photos, print, 4K/8K displays | Soft focus, mild blur, final export cleanup |
| Resolution change | Yes | No |
| Detail source | AI predicts new detail from image context | Existing pixels only |
| Best workflow | Use before sharpening when output size must increase | Use after resizing or upscaling as a finishing step |
What AI Image Upscaling Actually Does
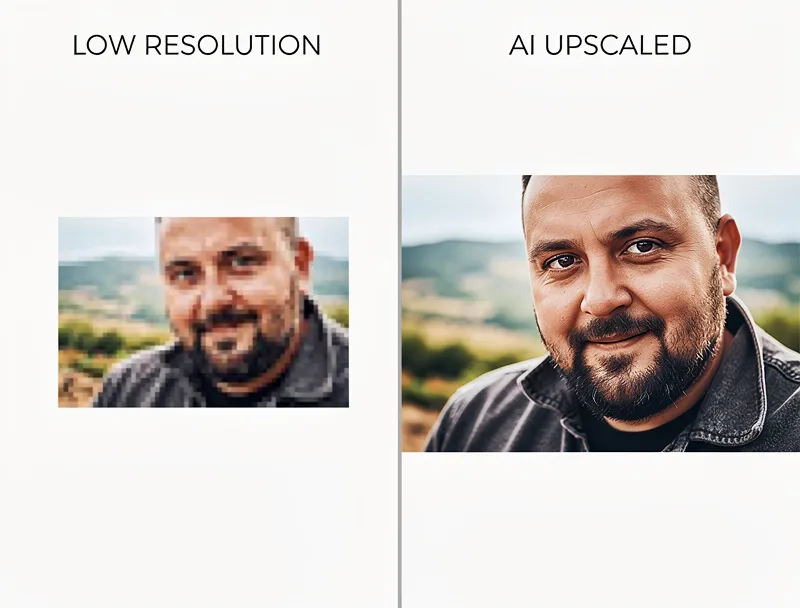
Upscaling increases the physical dimensions of your image. A 1000x1000 photo becomes 2000x2000 (2x) or 4000x4000 (4x). The pixel count goes up.
Traditional upscaling (bicubic interpolation) just guesses what goes between existing pixels. The result? Blurry mush. AI upscaling is different. Neural networks trained on millions of images predict what the missing detail should look like, then generate new pixels that look natural.
The result is an image that's physically larger while keeping — and sometimes improving — visual quality.
When you need upscaling:
- Your image is too small to print at 300 DPI
- You're posting to a platform that requires higher resolution (like 4K displays)
- You cropped a photo and need to recover the lost pixels
- You're enlarging old, low-resolution photos for restoration
- Product photos need to meet marketplace requirements
What changes: Image dimensions (width x height), file size, total pixel count.
What stays the same: The visual content — your photo shows the same scene, just bigger.
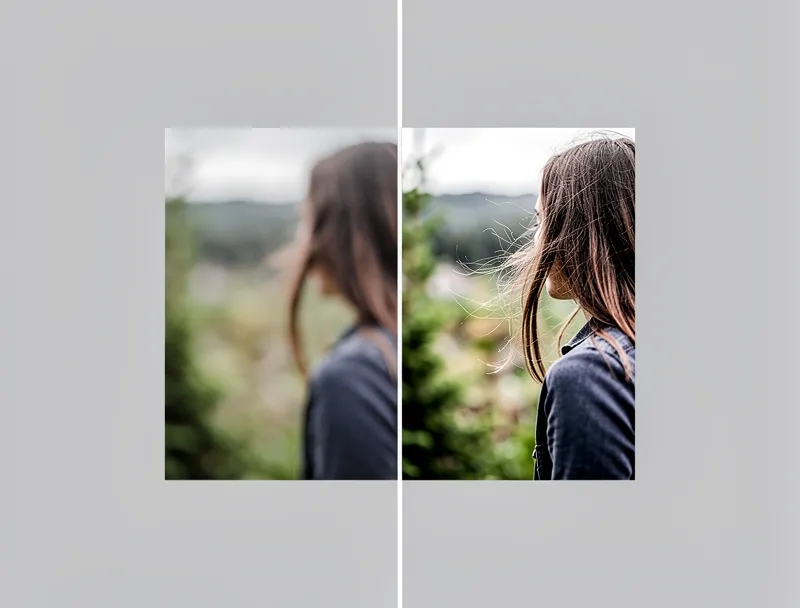
What Image Sharpening Actually Does
Sharpening doesn't change your image size at all. Not one pixel is added. Instead, it increases the contrast along edges — the boundaries between light and dark areas.
Think of a portrait photo where the eyelashes look slightly soft. Sharpening detects those edges and makes the dark side darker and the light side lighter. The eyelashes "pop." Your eye perceives more detail, even though the actual resolution hasn't changed.
AI-powered sharpening goes beyond simple edge detection. It recognizes textures — hair, fabric, skin, text — and applies different sharpening strategies to each. Text gets crisp edges. Skin stays smooth. Hair gets detailed without looking crunchy.
When you need sharpening:
- Your photo is the right size but looks slightly out of focus
- You shot at a slow shutter speed and got minor motion blur
- Compression artifacts made edges look soft (common with JPEG files)
- You want text in screenshots to look crisper
- You're doing final touch-ups before publishing
What changes: Edge contrast, perceived sharpness.
What stays the same: Image dimensions, pixel count, file resolution.
The Key Differences at a Glance
| Factor | Upscaling | Sharpening |
|---|---|---|
| Changes image size | Yes — 2x, 4x, 8x larger | No — same dimensions |
| Adds new pixels | Yes — AI generates detail | No — modifies existing pixels |
| Fixes blurry small images | Yes | No — can't create detail that isn't there |
| Fixes soft focus | Partially | Yes — its primary purpose |
| Risk of artifacts | Halos at extreme scales | Over-sharpened "crunchy" look |
| File size impact | Increases significantly | Minimal change |
| Best for printing | Yes — critical for large prints | Useful as a finishing step |
When to Use Both Together
Here's what most guides won't tell you: the best results often come from combining both techniques in the right order.
The correct sequence:
- Upscale first — get the image to your target resolution
- Sharpen second — fine-tune edge detail at the final size
Doing it backwards (sharpen then upscale) amplifies sharpening artifacts. Every hairy edge gets magnified 2x or 4x. It looks awful.
Practical example: you have a 500x500 product photo that needs to be 2000x2000 for Amazon. First, run it through an AI upscaler at 4x. Then apply light sharpening to make the product edges pop. Clean result, no artifacts.
If you're upscaling for printing specifically, our 300 DPI print guide walks through the exact pixel calculations for common print sizes.
Common Mistakes That Ruin Your Images
Mistake 1: Sharpening a Tiny Image Instead of Upscaling
Your 200x200 thumbnail needs to be a hero banner at 1600x1200. No amount of sharpening will fix this. You need upscaling. Sharpening a small image then stretching it in your layout gives you a sharp-but-pixelated mess.
Fix: upload your photo to the AI image upscaler and upscale to your target size first.
Mistake 2: Over-Sharpening
More sharpening doesn't mean better. Push it too far and you get bright halos around edges, skin that looks like sandpaper, and text with glowing outlines. Subtlety wins.
Fix: Apply sharpening at 30-50% strength. If you can see the effect at a glance, it's probably too much.
Mistake 3: Upscaling Already-Sharp Images Without Reason
If your 4K photo already looks great, don't upscale to 8K "just because." You'll quadruple the file size with minimal visual benefit unless you're printing at poster scale.
Fix: Match your upscaling target to the actual output size you need.
Mistake 4: Using Photoshop's Basic Resize Instead of AI
Photoshop's Image Size dialog uses interpolation algorithms from the early 2000s. They work, but AI upscalers trained on modern neural networks produce noticeably better results — especially for photos with faces, text, or fine textures.
Fix: Use a dedicated AI upscaler for the best quality. try the AI image upscaler free — the difference is visible immediately.
Which Technique for Which File Format?
Not all formats respond the same way to upscaling and sharpening.
- JPEG: Upscaling works well but watch for compression artifacts getting amplified. AI upscalers handle this better than traditional methods.
- PNG: Upscales cleanly since there's no lossy compression. Sharpening is rarely needed.
- WebP: Similar to JPEG — AI upscaling removes WebP compression artifacts during enlargement.
- RAW: Contains maximum detail. Sharpen in your RAW editor first, then upscale if needed.
- HEIC: iPhone photos. AI upscaling works great on these since HEIC preserves good base detail.
Real-World Scenarios
Scenario 1: Wedding photo from 2010 (2 megapixels) Problem: Too small to print at 16x20 inches. Solution: Upscale 4x with AI, then light sharpening.
Scenario 2: Product shot that looks slightly out of focus Problem: Right size but soft details. Solution: Sharpen only — the image is already the correct resolution.
Scenario 3: Screenshot for a presentation Problem: 720p screenshot needs to fill a 4K display. Solution: Upscale 2x to match the display, no sharpening needed (AI handles text well).
Scenario 4: Social media photo that was compressed Problem: Downloaded Instagram photo looks mushy at full size. Solution: Light upscaling (2x) to recover detail the AI can reconstruct from compression patterns.
How to Upscale Images With AI Right Now
If you've read this far and your problem is "my image is too small" — upscaling is what you need. Here's how:
- Go to MyImageUpscaler
- Upload your image (supports JPEG, PNG, WebP, HEIC, and more)
- Select your upscaling factor (2x or 4x)
- Download your enhanced image
No account required. No watermarks. Your upscaled image is ready in seconds.
If your image is the right size but just looks soft, most photo editors (Lightroom, Photoshop, GIMP) have sharpening tools built in. But for the combination of upscaling + AI enhancement, a dedicated AI photo enhancer gives the best results with zero manual tweaking.
AI Upscaling vs Sharpening FAQ
Is AI upscaling the same as sharpening?
No. AI upscaling increases image resolution by generating new pixels. Sharpening keeps the same resolution and makes existing edges look clearer.
Should I upscale or sharpen first?
Upscale first, then sharpen lightly. Sharpening before upscaling can magnify halos, noise, and crunchy edge artifacts.
Does sharpening increase resolution?
No. Sharpening changes edge contrast only. It can make an image look clearer, but the width, height, and pixel count stay the same.
When should I use AI upscaling?
Use AI upscaling when an image is too small for print, ecommerce, a large screen, a cropped layout, or a higher-resolution export.
The Bottom Line
Upscaling = making images bigger (adding pixels with AI). Sharpening = making images crisper (enhancing edges at the same size).
For automatic cleanup beyond edge sharpening - including denoising, detail recovery, and color correction - try the AI photo enhancer.
Different tools for different problems. Use upscaling when your image is too small. Use sharpening when your image is the right size but soft. Use both (upscale first, sharpen second) when you need maximum quality at a larger size.
Try AI upscaling free — upload any photo and see the difference in seconds.

Reviewed byJoao Furtado
AI Image Upscaling Specialist
Joao is the founder of MyImageUpscaler and an AI image upscaling specialist. He tests every guide against real upscaling workflows — comparing model outputs, evaluating sharpness and artifact tradeoffs, and validating tool recommendations before publication.
- AI image upscaling
- Model comparison
- Photo restoration
- E-commerce image prep